Here’s my recap of my process of upgrading my Ibanez Artcore Expressionist AM93 semihollowbody guitar with new RMC Pow’r Bridge ‘G’ pickups in the bridge along with the Poly-Drive 1 electronics module and all new control wiring.
Watch The Video
Overview
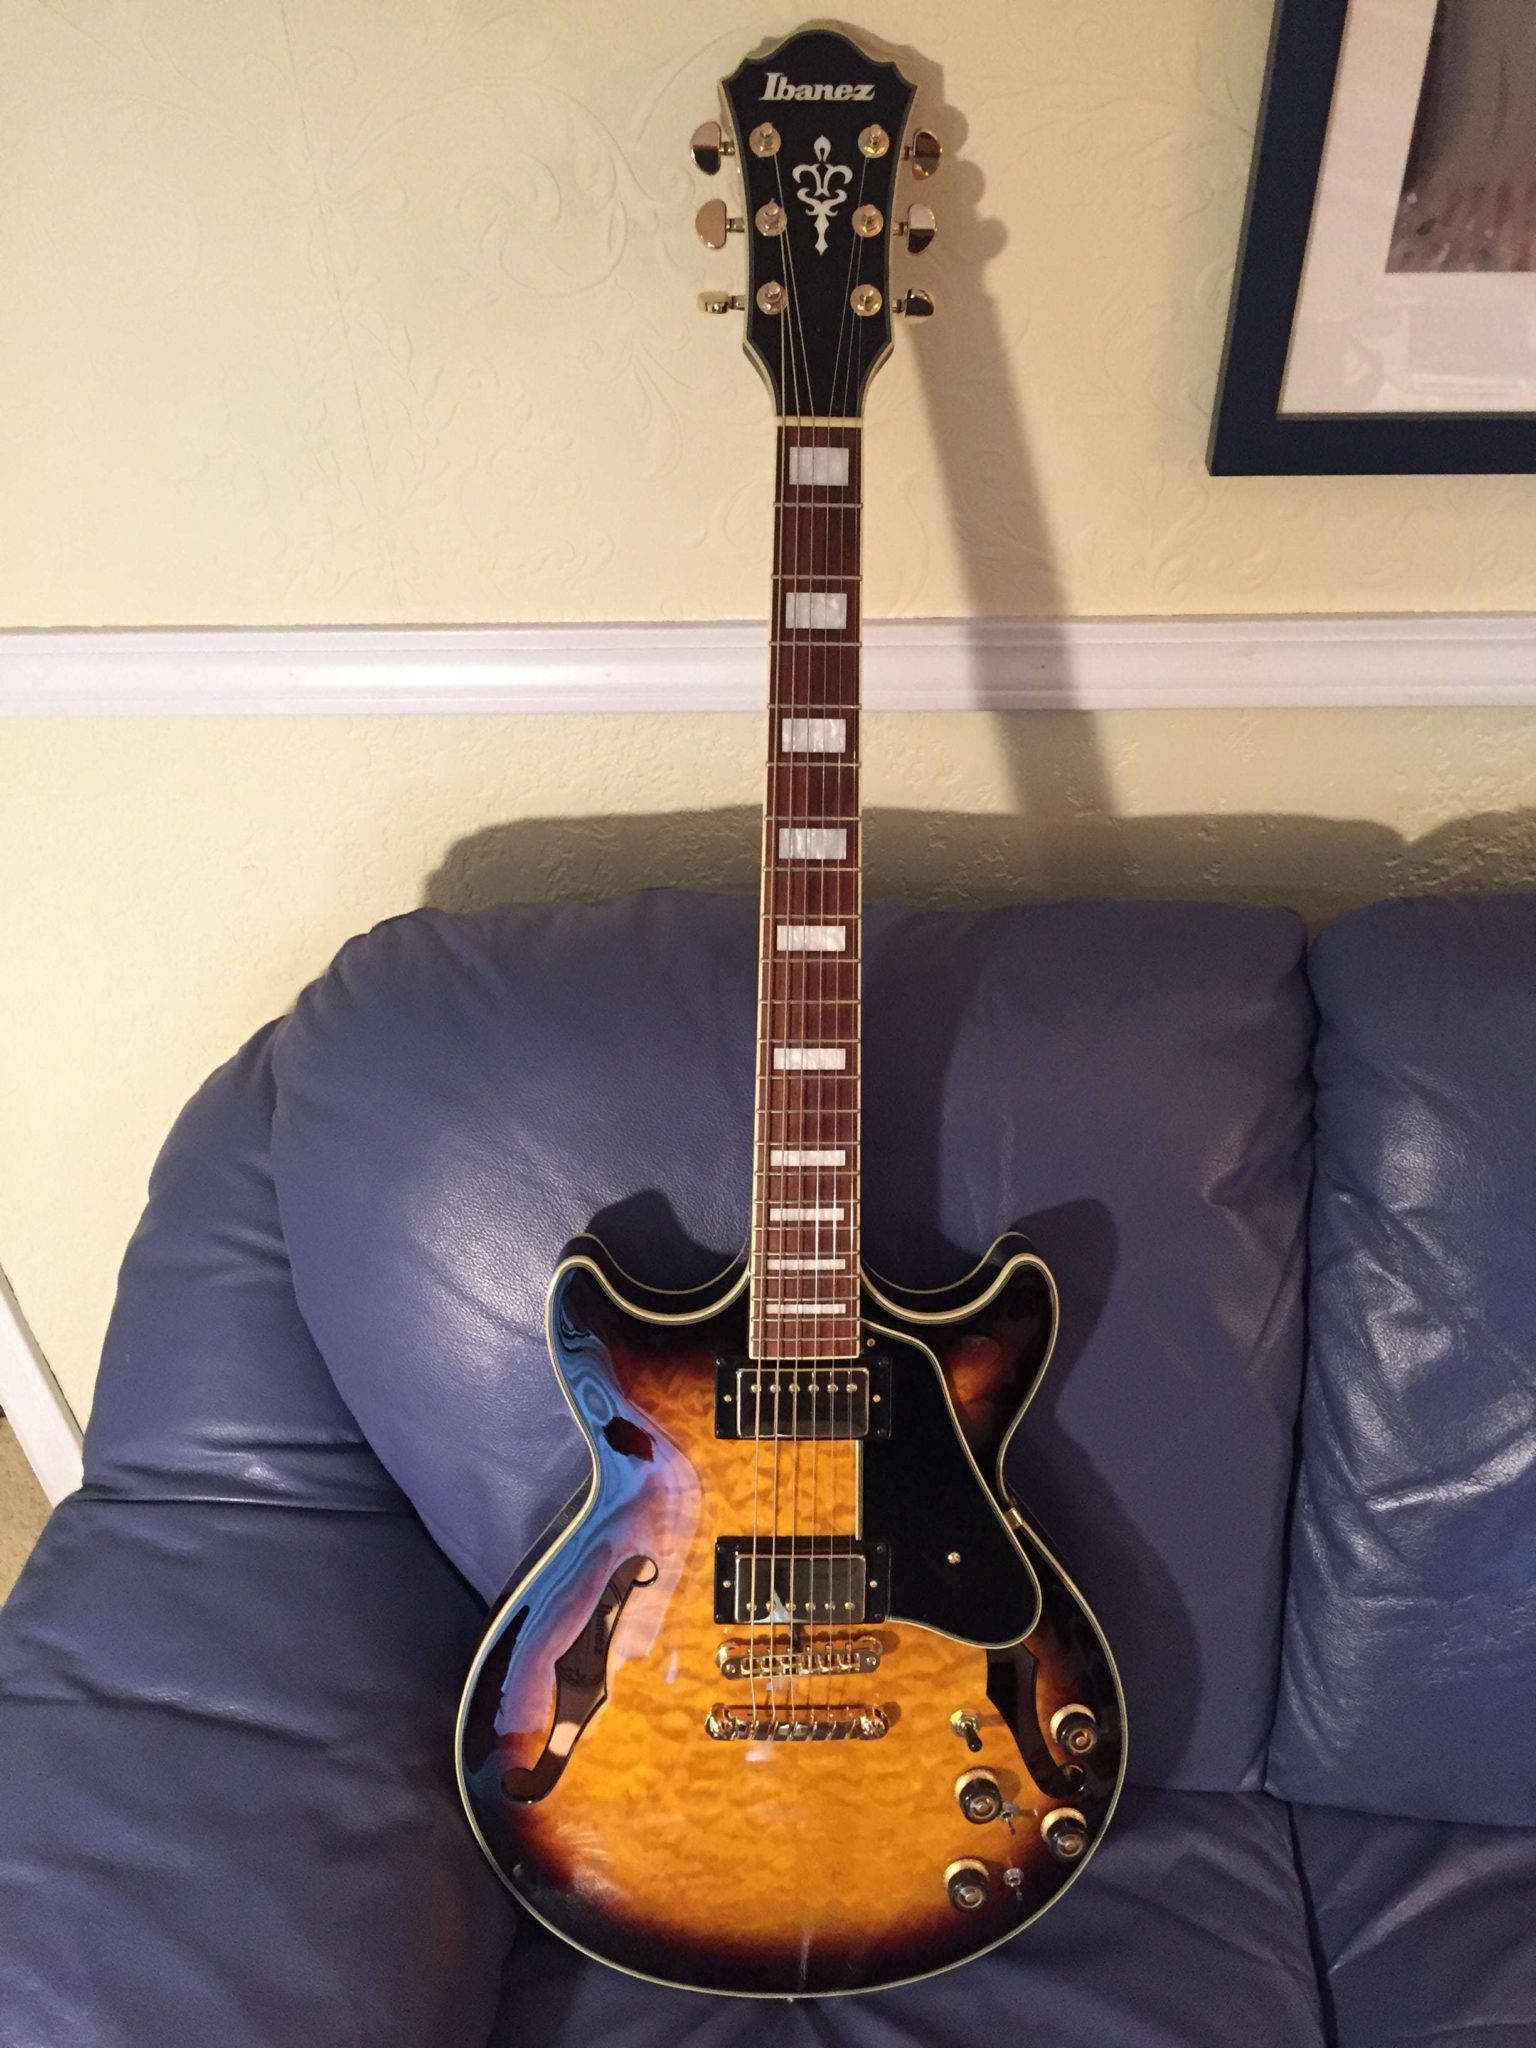
The synth access equipped guitars on the market, for example such as those available from Godin (LGX-SA and LGXT-SA) or Carvin (Frank Gambale FG1) were very attractive to me but cost more than I wanted to spend on a guitar. Besides I love working on things so I decided to do this upgrade myself and document what I did in case anyone else wants to give it a try too. I had already had a few years experience using the Roland GK-3 external mount pickup on my Epiphone “dot”, which worked great, but it was big and ugly. Sure, beauty is in the eye of the beholder, buy in my beholder eyes I decided I didn’t like it. Also, I had moved on to the smaller body (ES-339 style) Artcore AM93 and I wanted to keep it as stock looking as possible while still being able to enjoy synth access.
Perhaps the biggest challenge was the bridge. The RMC “PBG pickup saddles” retro-fit the Schaller GTM (Nashville) bridge as well as the TonePros TP-6 bridge, but they don’t fit in the Gotoh tune-o-matic bridges because the intonation screws are too high in the Gotohs. The bridge in the Artcore is called by Ibanez the Art-1 bridge and I don’t know who makes it, but I took measurements and determined that the RMC pickups would not fit. In the end, I decided to buy a Schaller GTM bridge, but the main problem was that the Schaller bridge posts/bushings were smaller than the Artcore bridge posts. I fashioned wood plugs for the holes and drilled them out to fit the new Schaller posts. This required very careful measuring and rechecking. Once it was verified I glued them in with Titebond hide glue. Be careful to wipe up any excess glue from the guitar finish!
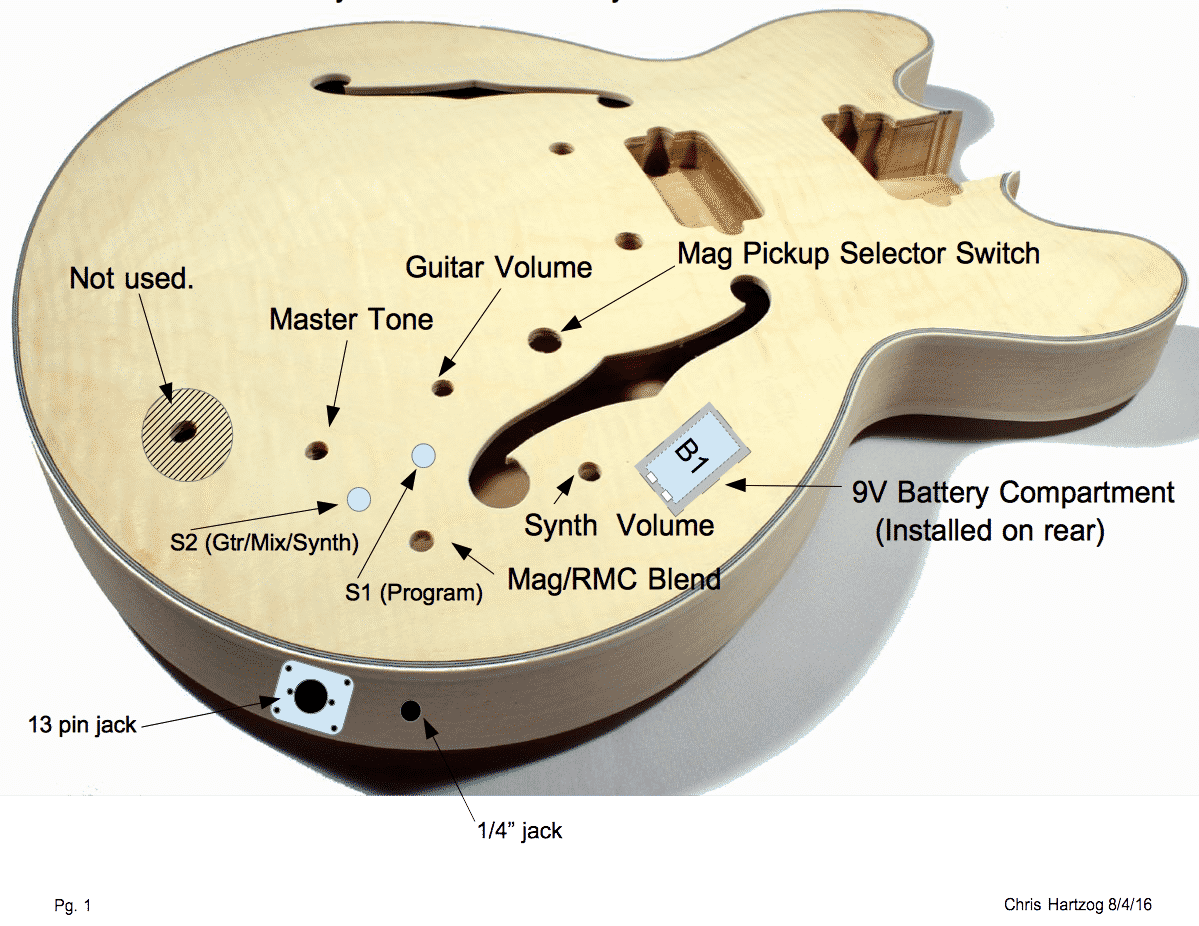
Before beginning any work, I carefully planned what I would do. Below is a copy of my proposed control layout diagram. I couldn’t find graphic of a blank Artcore body online, so I went with this one and about the only major difference is the extra hole on the top for the ¼ inch output jack which is on the side on the Artcore.
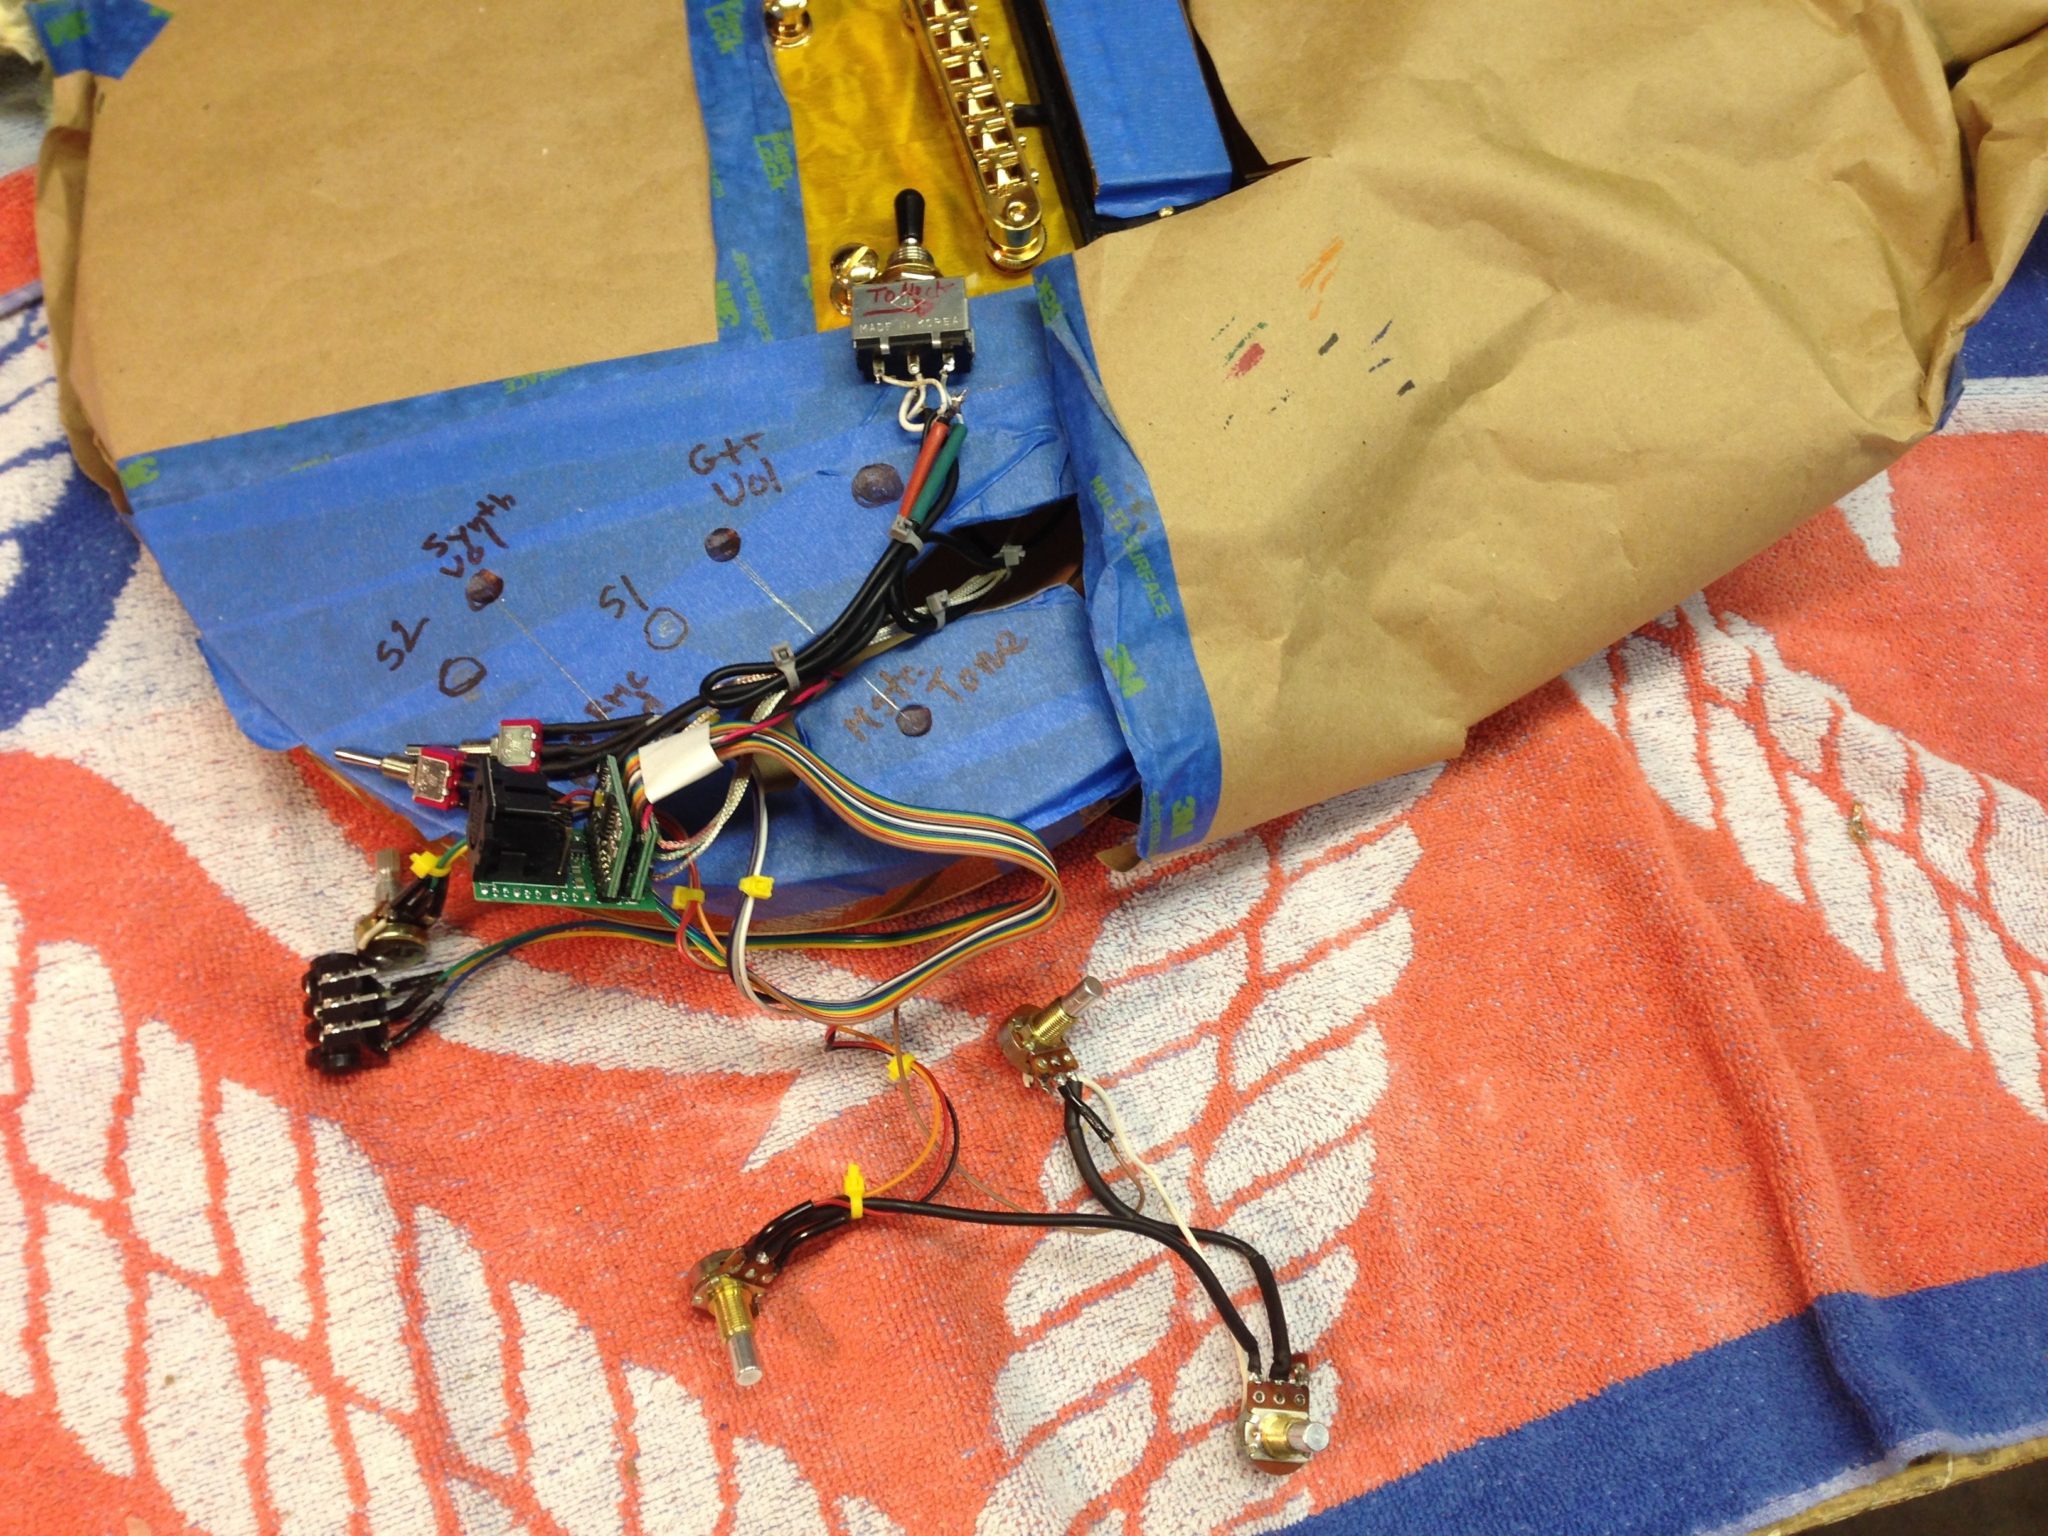
I also did my own wiring diagram that would be specific to my particular guitar. My install included what RMC calls the “Cool Circuit” which provides a master tone, guitar volume, synth volume and RMC/Mag pickup blend control.

Procedure
1 Bridge Post Hole Retrofit For Schaller Gtm Bridge
- Remove guitar strings. I discarded the factory strings as I had new D’Addario NYXL strings that I wanted to install when I was done.
- Remove stop bar. (It will actually slide off its posts as soon as you remove the strings.)
- Remove stock bridge. Set it aside until you are ready to replace the saddles with the RMC pickups.
- Extract stock bridge bushings. Place a short screw or bolt in the bushing hole and then tighten the bushing against the screw until the bushing lifts out of the hole.
- Measure bridge post hole diameter and depth.
- ID:
- Depth:
- Fabricate post hole plugs:
- OD: 17/64”
- Length:
- ID of Schaller bushing:
- Verify Schaller bushings fit in the fabricated post hole plugs.
- Re-verify post hole depth and plug length:
- Depth:
- Plug Length:
- Hole spacing:
- Install plugs and glue in place.
- Press in Schaller bushings.
2 Bridge Saddle Replacement
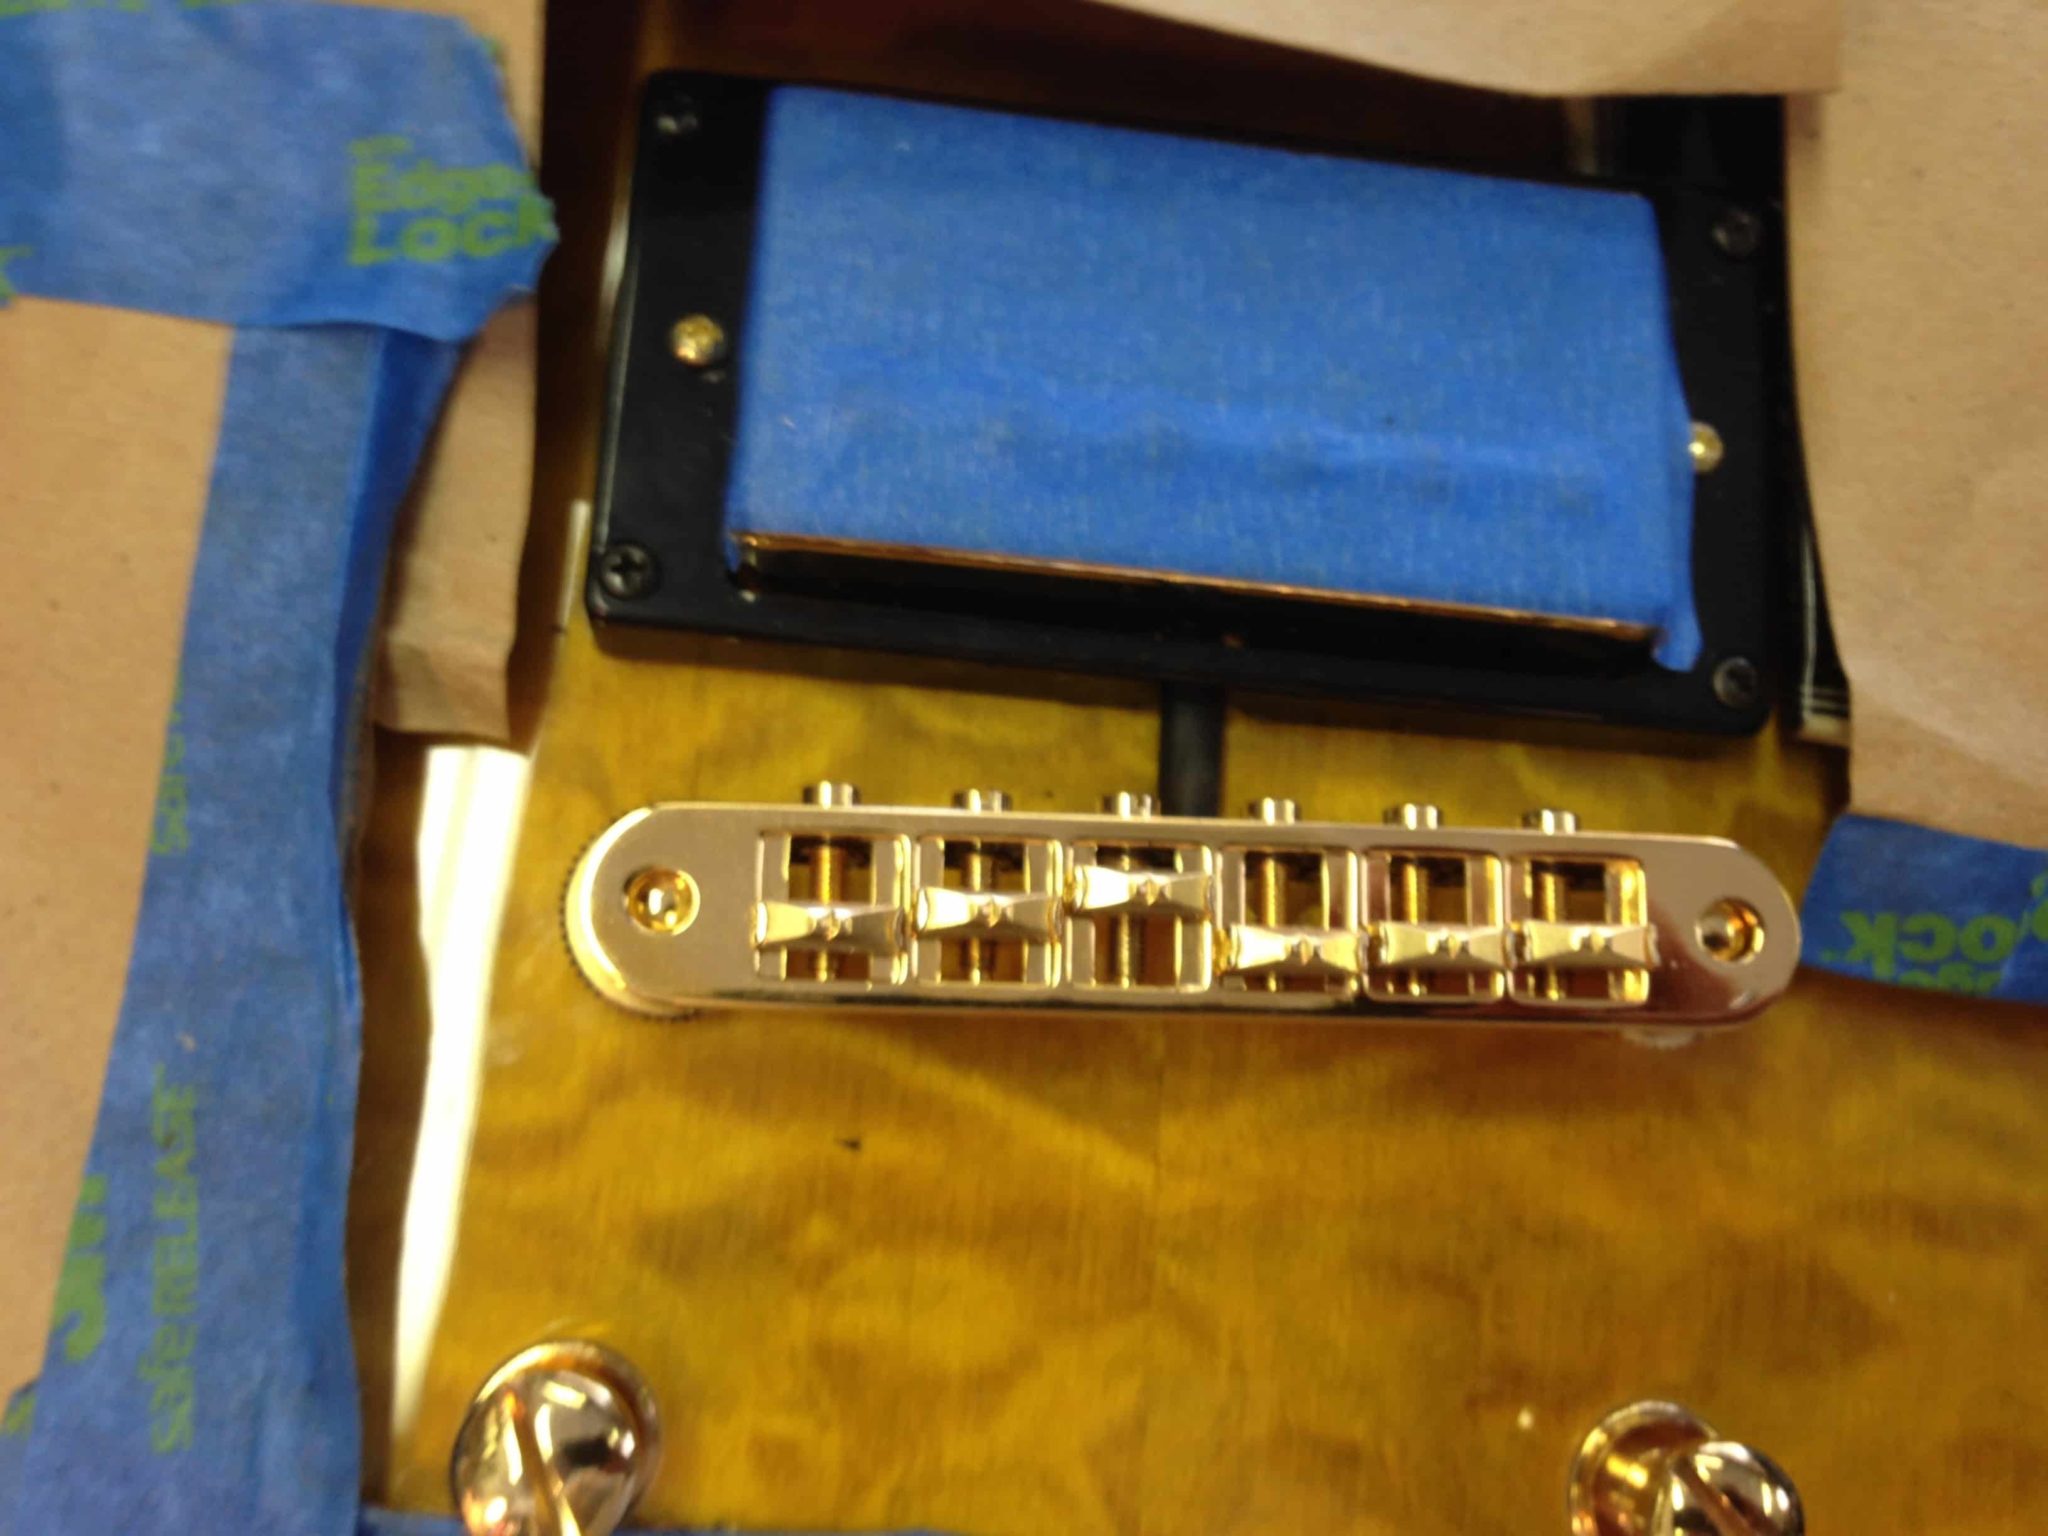
- Remove and replace bridge saddles with RMC saddles per RMC instructions.
- Remove bridge pickup and move it out of the way.
- Install Schaller bridge.
- Route pickup cables into guitar body.

3 RMC Wiring connections
- Remove the volume and tone knobs. Tip of the hat to Sweetwater’s Insync for the helpful suggestion to employ the tip of a spoon as a lever to pry the knob up. Be sure to protect the finish with a cloth or napkin and pry gently.
- Remove the nuts and washers from the volume and tone pot stems, the pickup switch and the ¼ inch jack. (Save them in case you need an extra nut or washer later.)
- Remove all stock wiring through bottom F-hole:
- Volume and tone pots. (Label the pickup wires)
- ¼” guitar jack
- Pickup selector switch
- Discard pots and ¼” jack.
- Mark and drill holes for S1 and S2.
- Drill size:
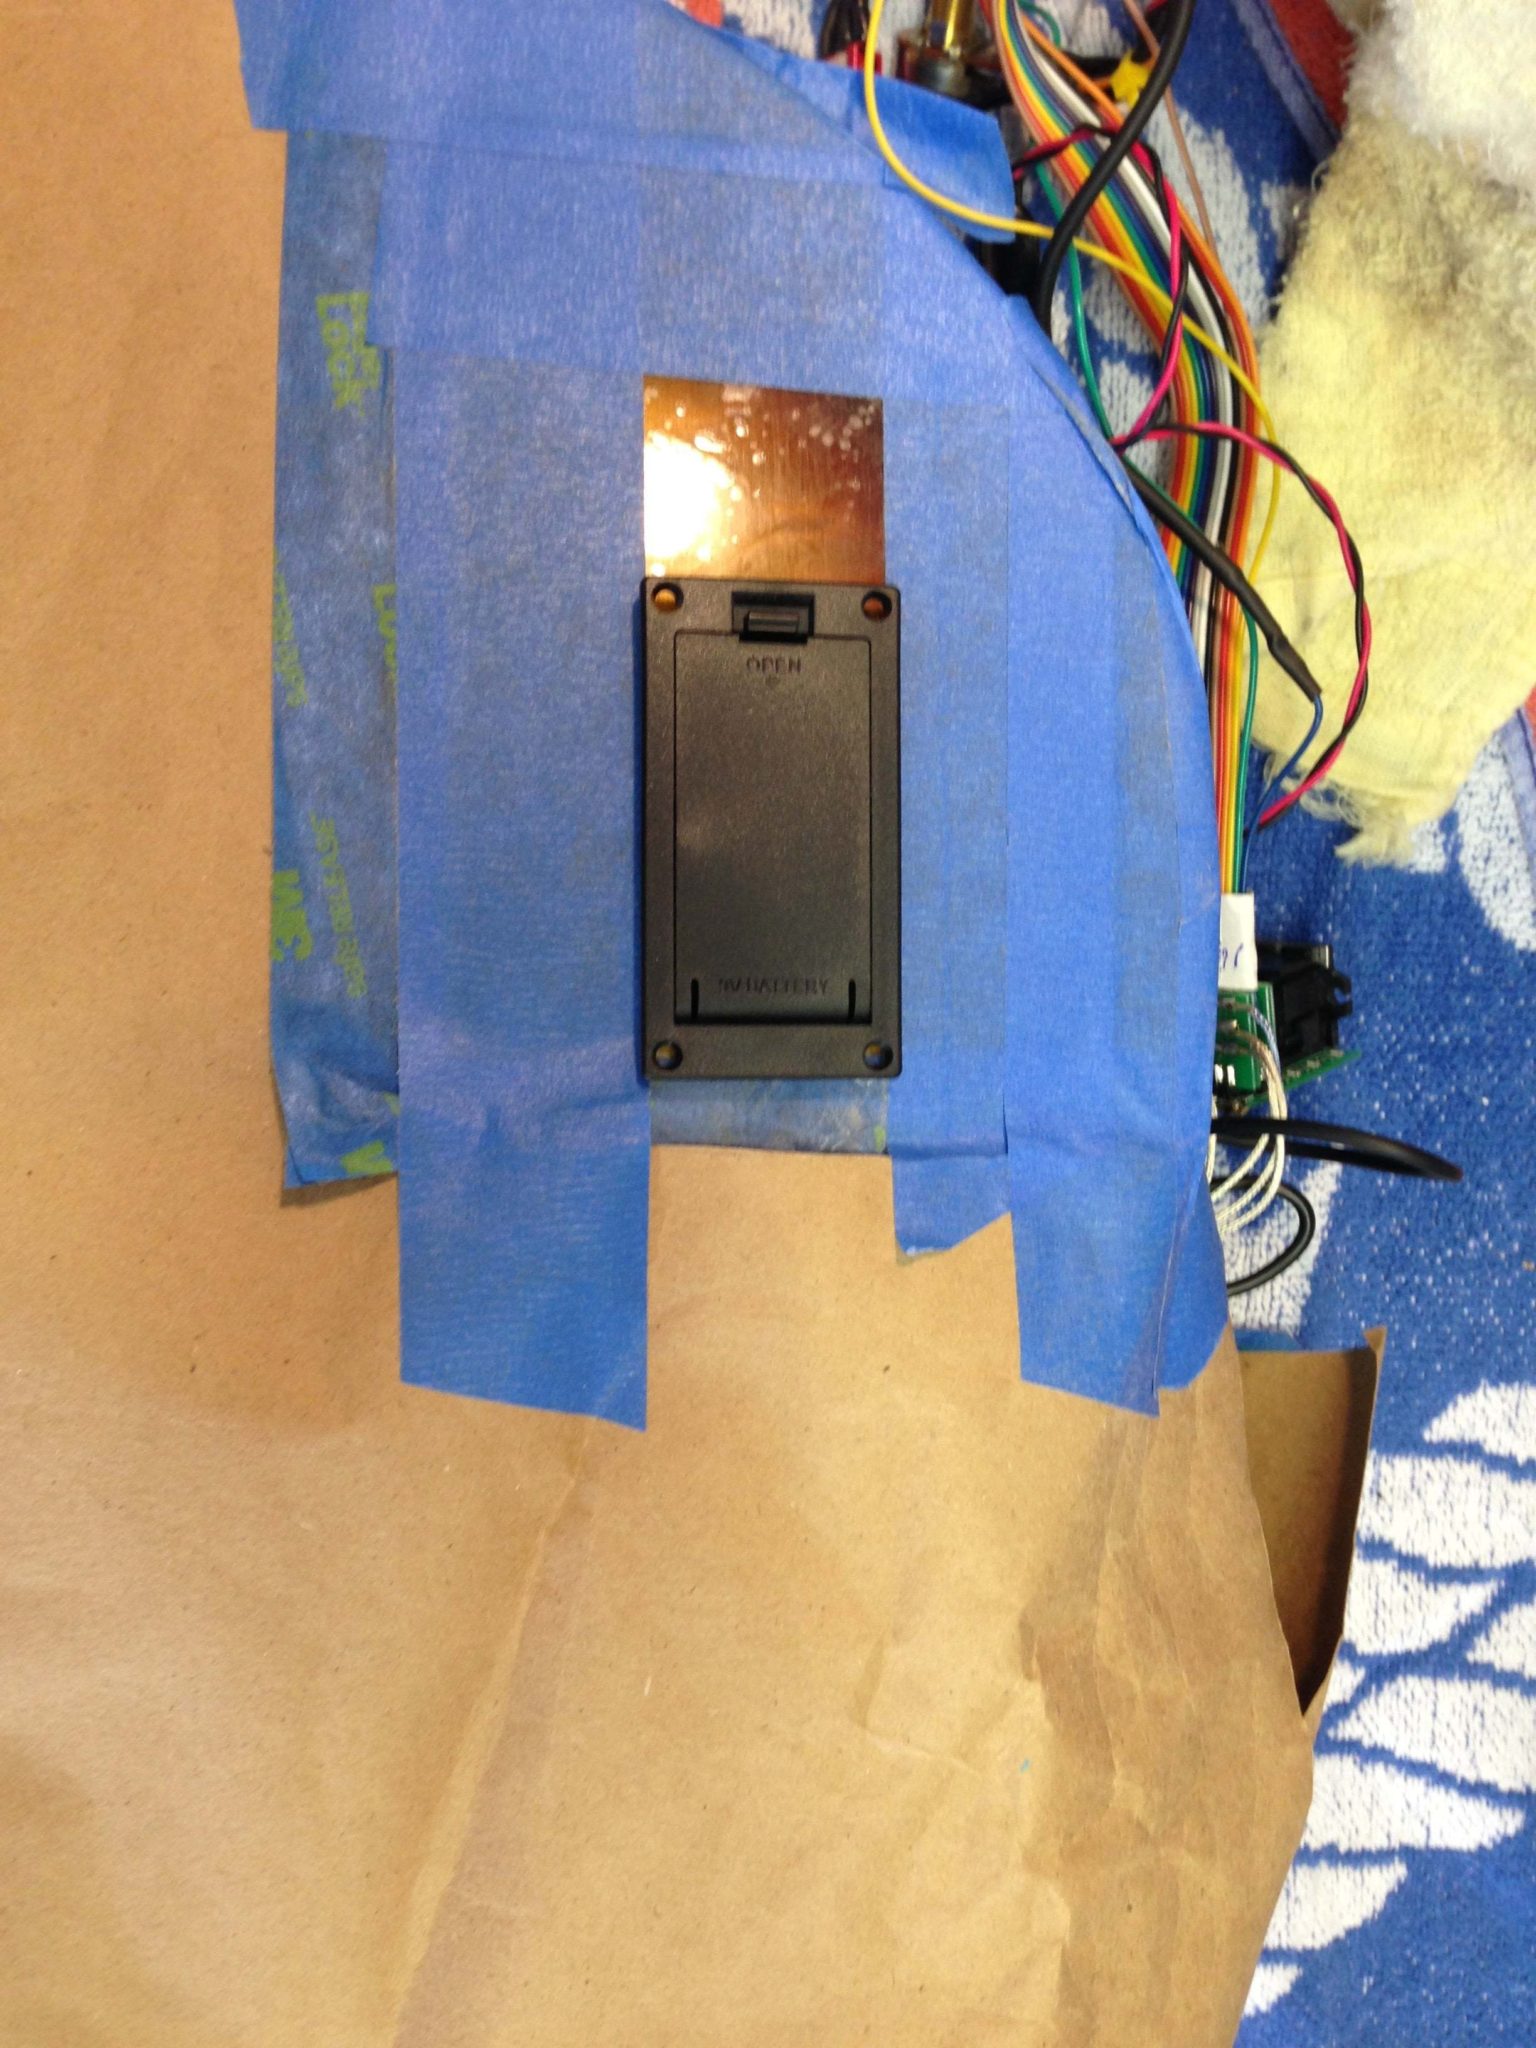
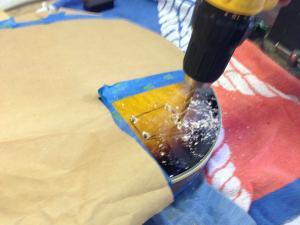
- Mark and cut opening for the battery box. (Note: it is not shown here, but I applied masking tape first over the areas where I needed to cut into the guitar to avoid chipping the nearby finish.)

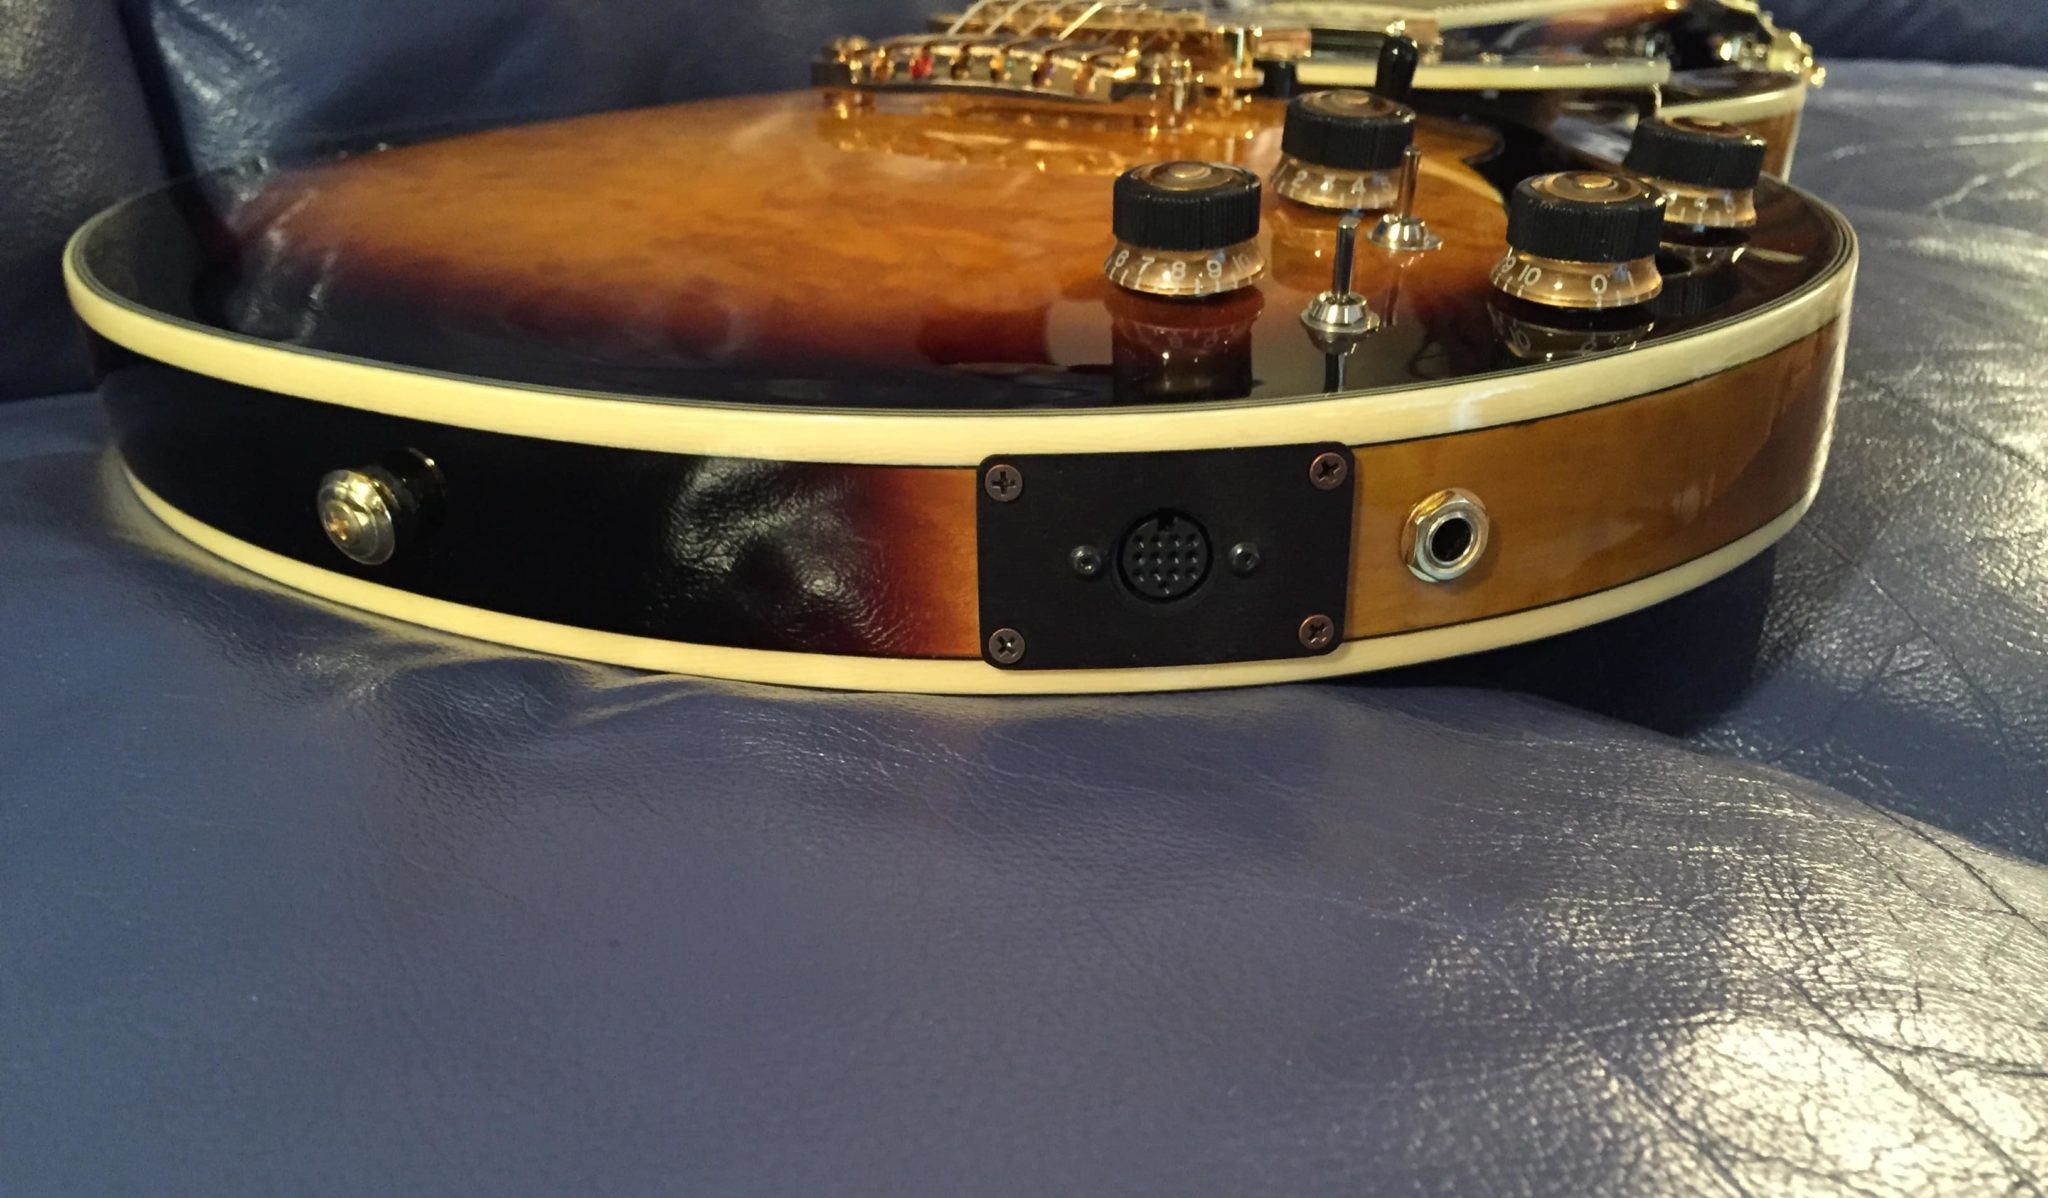
- Mark side for jackplate opening.
- Make template for jackplate opening cutting/routing.
- Cut/route side opening for jackplate.
- Connect mag pickups to selector switch.
- Connect all Poly-Drive wires per RMC drawing.
- Connect mag pickup ground wires to Poly-Drive module per RMC drawing.
- Connect pickup selector switch to Poly-Drive module.
- Connect RMC pickup wires to Poly-Drive module per RMC drawing.
- Add cable tie down to secure inside guitar.
- Route battery wires to battery box.
4 RMC Wiring Harness Installation
- Insert Poly-Drive module and ¼” jack through F-hole.
- Attach module with two screws and ¼” jack with nut to dual jackplate.
- Attach jackplate to guitar with screws.
- Attach all pots and switches.
- Connect battery wires to battery box.
- Secure internal wires to guitar interior.
- Reinstall bridge pickup.
- Install strings.
- Tune and check string action and intonation.
- Install 9V battery.
- Test all functionality:
- S1: Changes GR-55 programs?
- S2 = Gtr + connect ¼” to amp: Mag pickups work?
- S2 = Synth + 13 pin to GR-55: RMC pickups work?
- S2 = Mix: Both pickups work?
- Guitar volume works?
- Master tone works?
- Mag/RMC blend works?
- Polish guitar.
- Create GK Set in GR-55 with setting applicable to RMC piezo pickups.
- Go play your guitar!