Here is a summary of the rest of the steps to finish my cigar box ukulele. See Part 1 and Part 2.
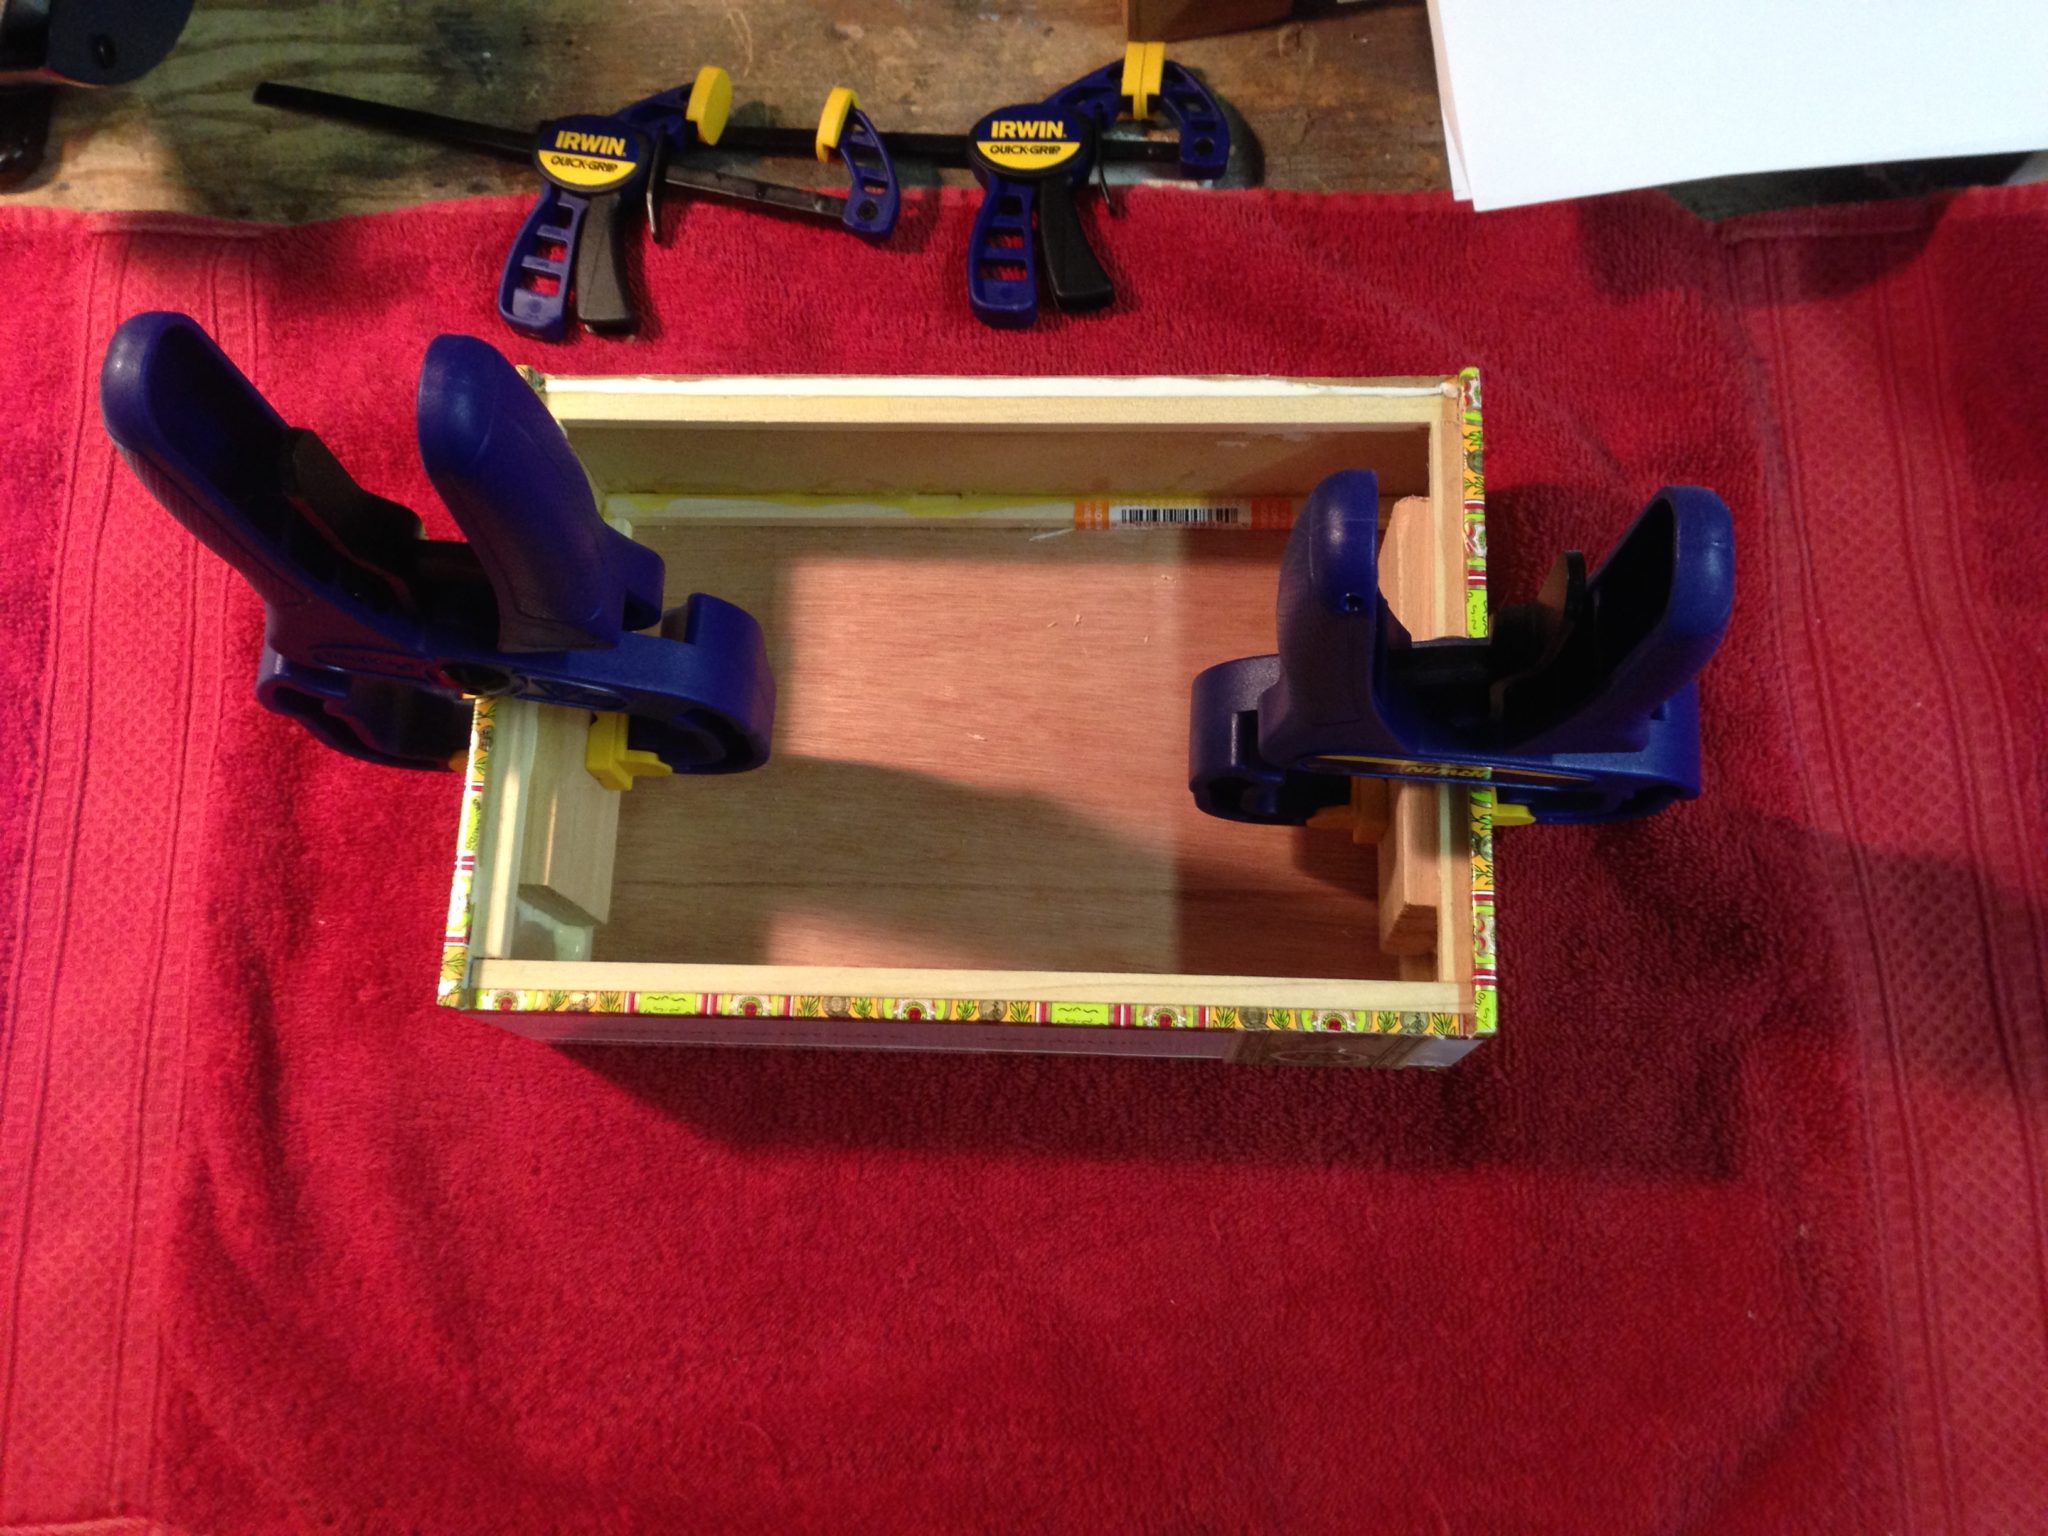
After installing the end block in the front and back ends of the cigar box like this,
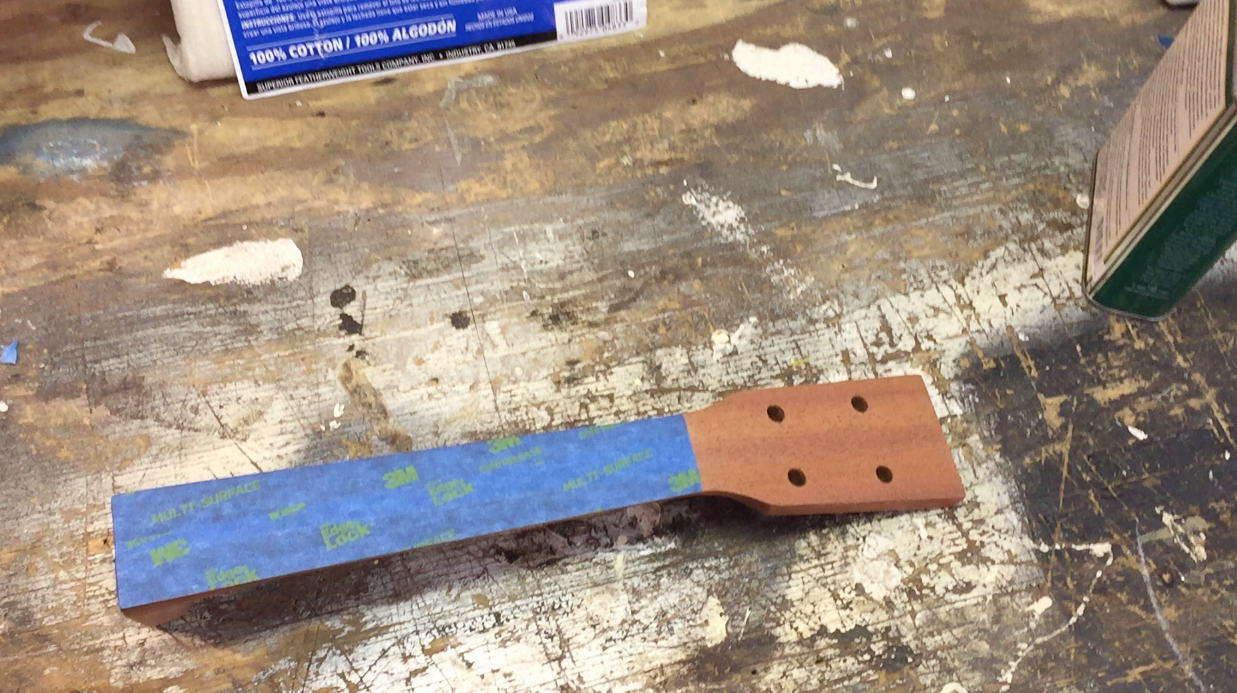
I began working on the neck. Rather than try to carve and craft my own neck I purchased a solid mahogany the neck, fretboard, nut and bridge from Mainland Ukes and that saved a lot of work. Nevertheless, the neck still required finishing including a lot of sanding:
Finishing the Neck
- Sand the neck with 120 grit sandpaper.
- Apply a coat of mineral spirits.
- Look for flaws in the wood that the sanding missed.
- Repair any sanding flaws.
- Wipe on mineral spirits to clean the wood.
- Let dry completely.
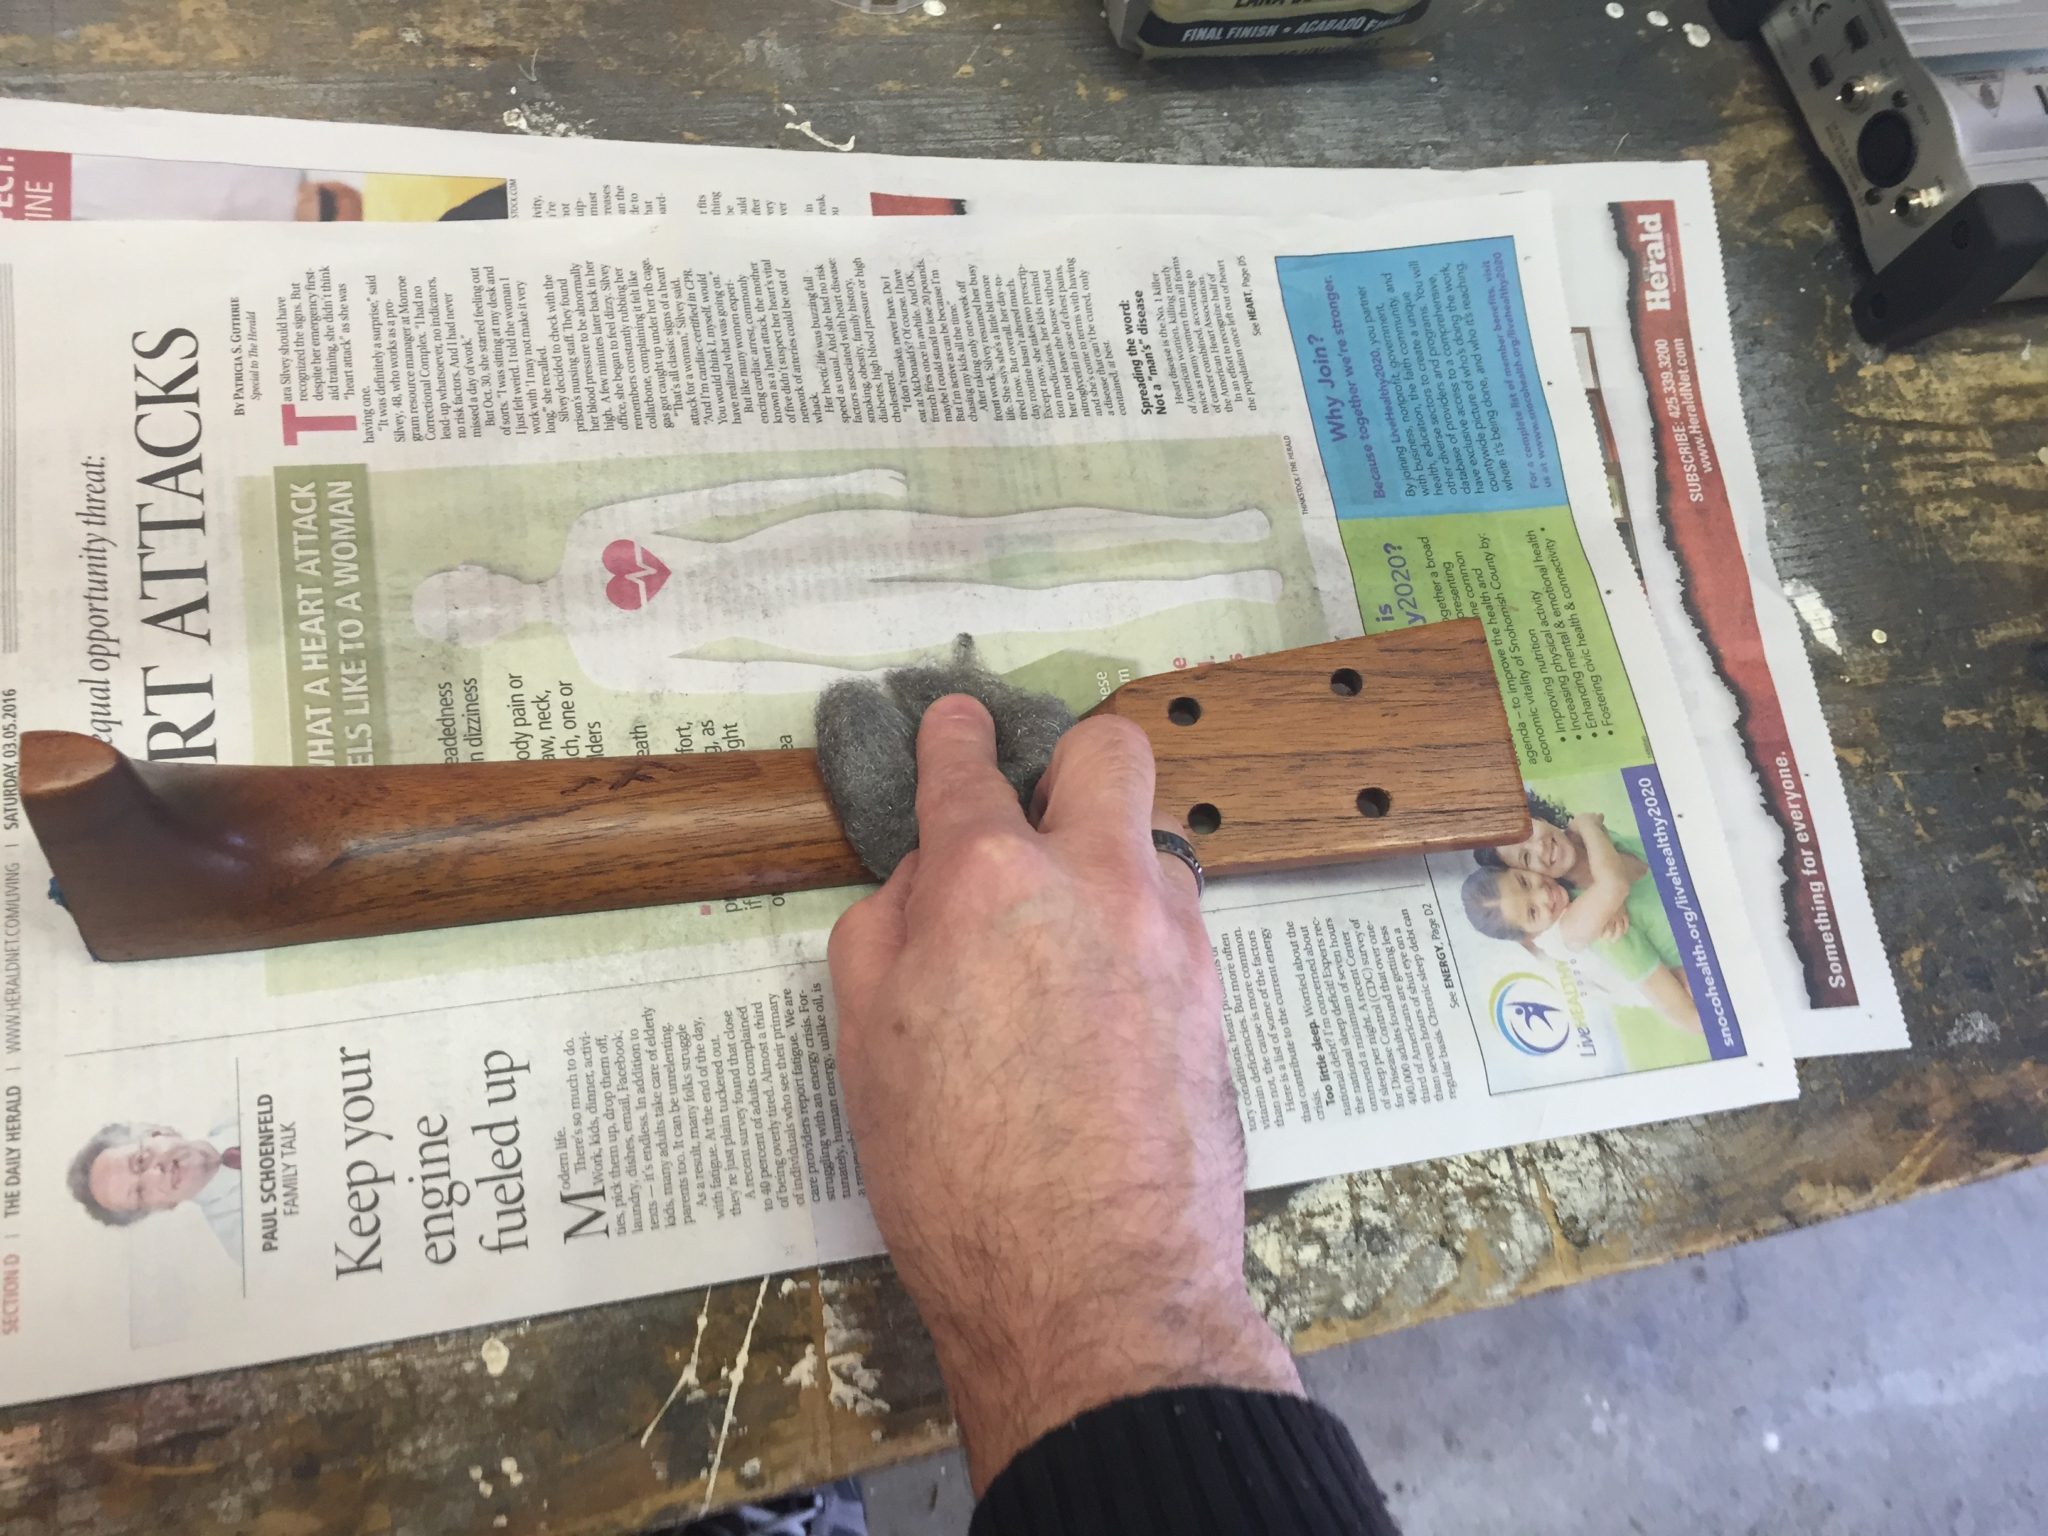
- Before applying finish, I masked the area on the neck where the fretboard will be attached to ensure a good surface remains to apply glue.

- Apply a coat of tung oil. I used lint free cheese cloth as an applicator.
- Let the tung oil dry overnight.
- Sand with steel wool. (Be sure to completely clean the work area from any trace of steel wool shavings, or they will contaminate the instrument during the next application of finish.)
- Apply a second coat of tung oil.
- Sand with steel wool.
- Spray with clear lacquer.
- Let dry.
- Sand with steel wool.
- Spray with a second coat of lacquer.
- Sand with steel wool.
- Remove the masking.

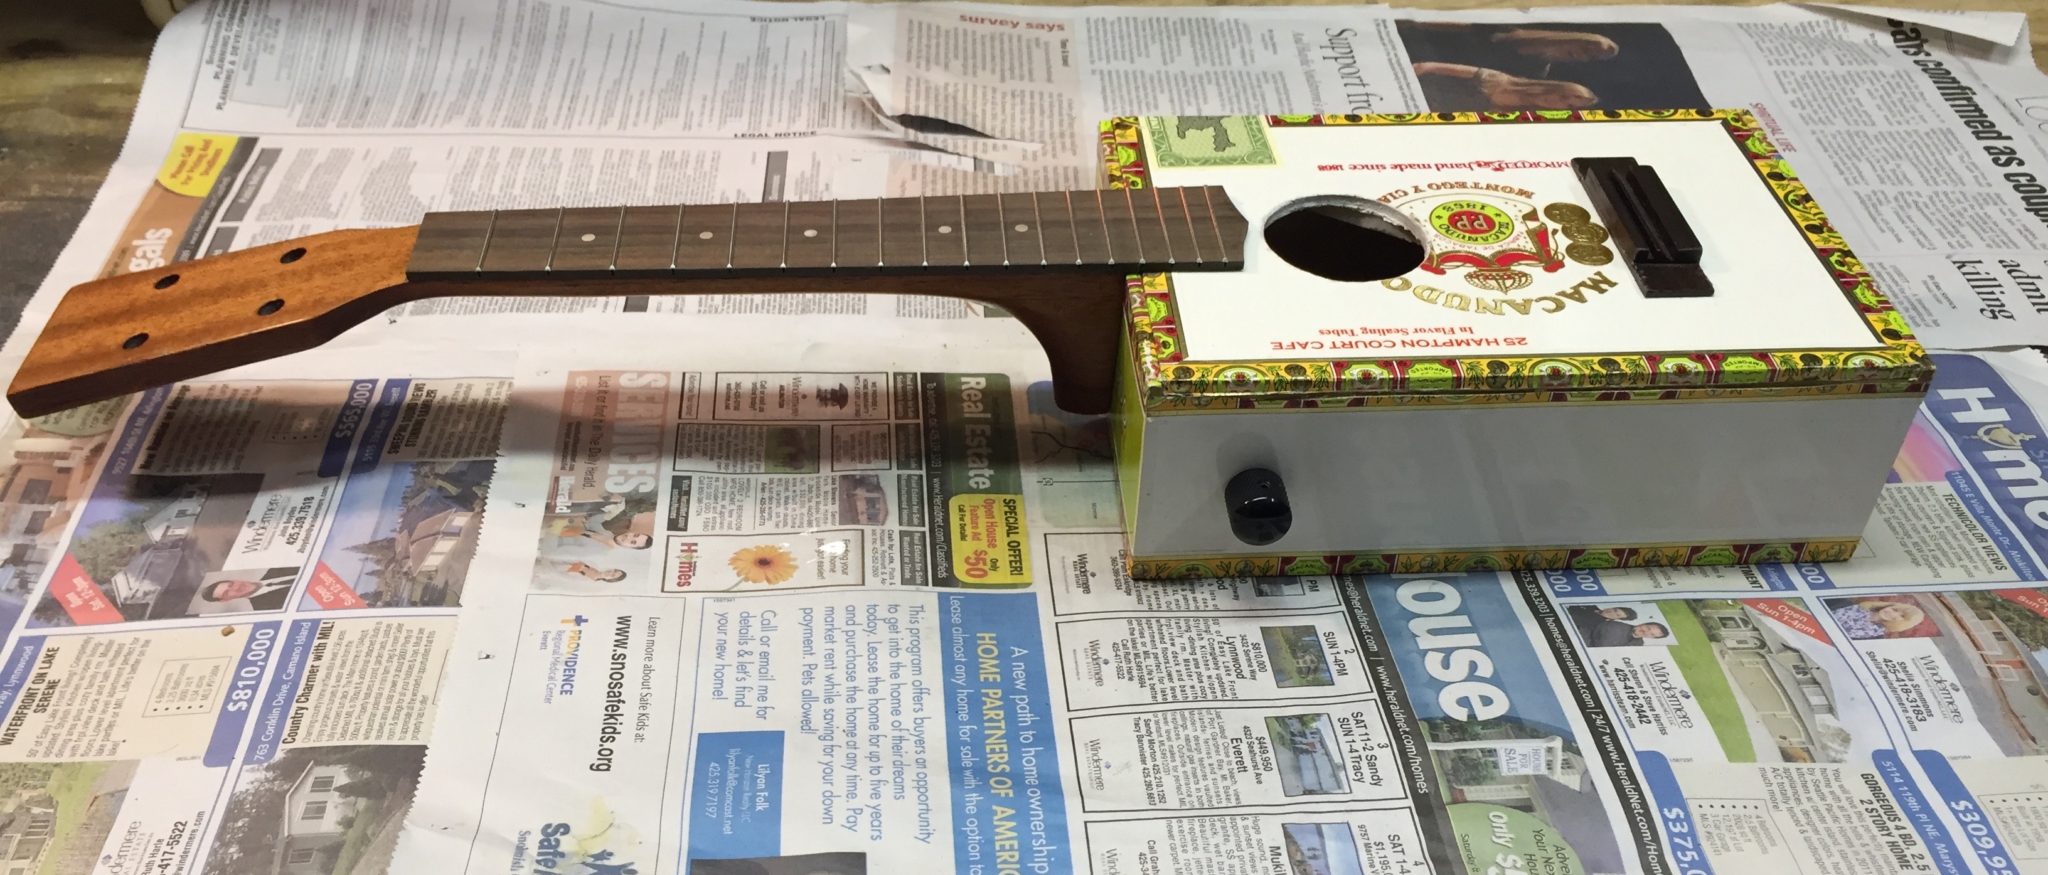
Test Fit the Neck
- Place the top of the cigar box back in place. The center line of the neck needs to line up perfectly with the center line of the box. Also, the height of the neck must allow for the fretboard to extend over the cigar box, but it should be flush with the top surface of the box. I temporarily attached the fretboard to the neck with some clamps during the fitting.
- Using a pencil, lightly mark an outline on the front of the box for where the neck will attach.
- Remove the top. Take measurements from the front to where the neck will be located and transfer that to the inside. Drill three pilot holes through the end block for the neck attachment screws.
- Attach the neck using appropriate length screws based on the thickness of the end block plus the cigar box wall and the depth required of the heel of the uke neck.
- Put the cigar box top back in place and temporarily attach the fretboard to the neck.
- Measure to determine the location of the bridge and saddle. For my concert size uke, the scale length is 15 inches from the back of the nut to the center of the saddle. Record these measurements and/or lightly mark the location for the bridge and the nut.
- If the cigar box is paper covered, mark an outline of the bridge and using a sharp razor blade, cut through the paper and remove the paper. This will ensure a good surface for gluing.
- Glue and clamp the bridge in place and let dry.
- With the neck and fretboard still attached, mark the location for the sound hole. Drill the sound hole.
- Remove the neck from the box and set aside.
Final Finishing
- Mask the bridge.
- Spray the entire box with lacquer.
- Let dry.
- Sand with steel wool.
- Apply another coat of lacquer.
- Let dry.
- Sand with steel wool.
- Remove the masking.
Final Assembly
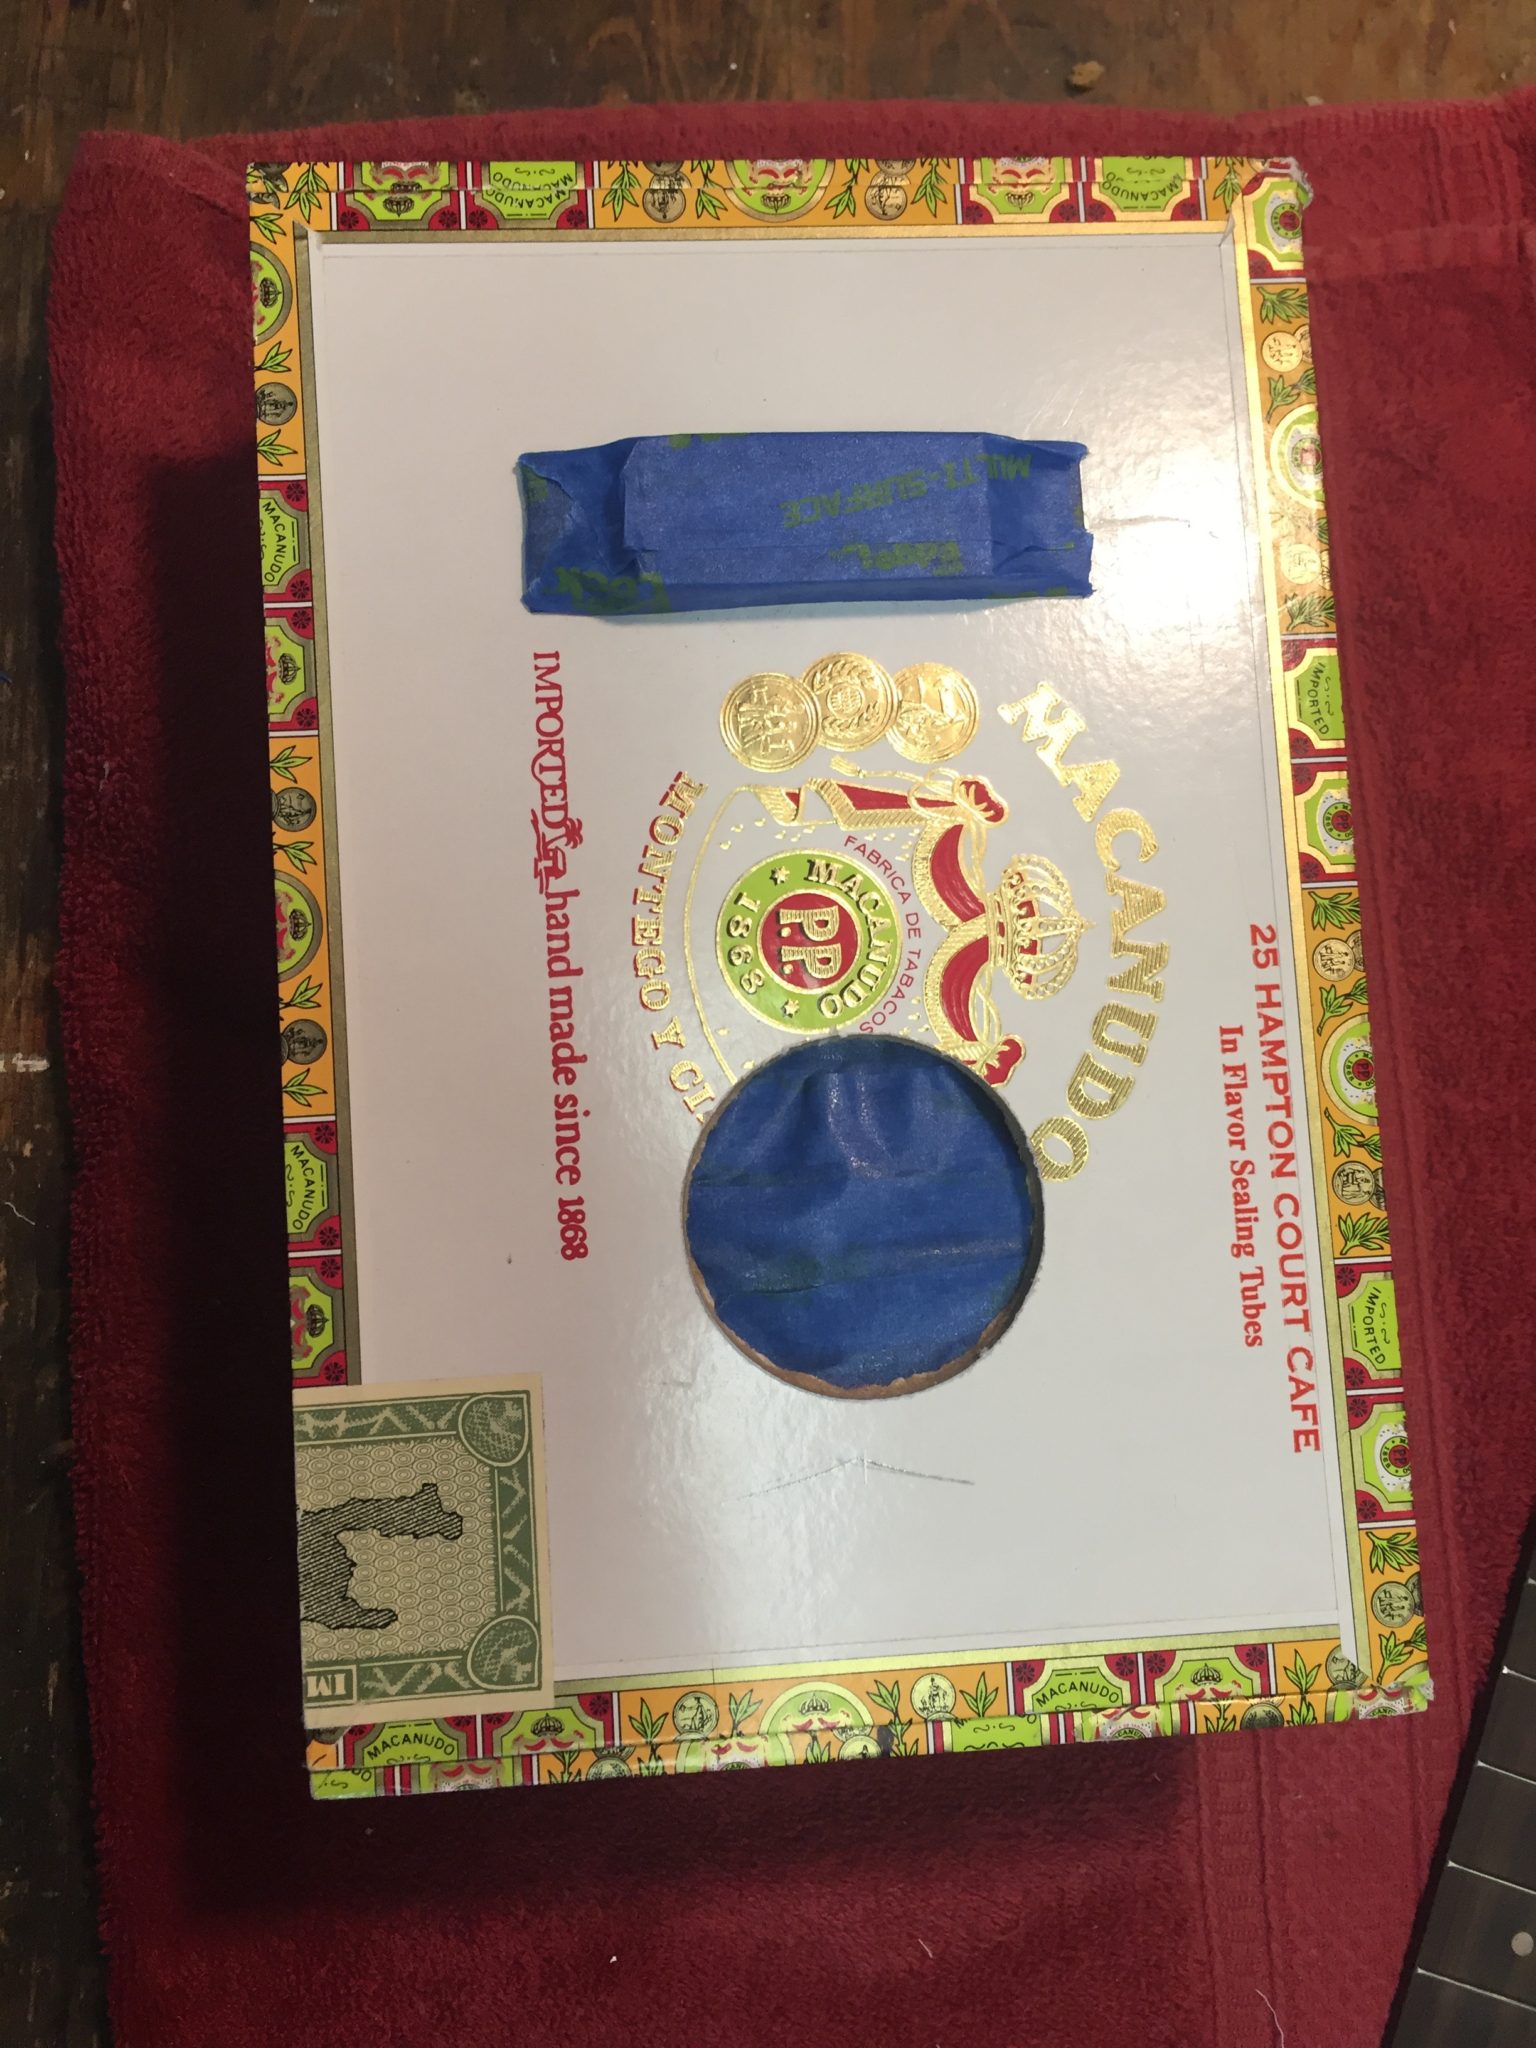
- If you are going to install a pickup, do it now before you glue the lid in place. Follow the pickup manufacturers instructions for installation. I used an ‘Aloha Twin’ ukulele pickup from K&K Sound and it works awesomely. Important: Be sure to test the pickup by plugging into your amplifier and tapping on it to verify it is outputting sound BEFORE you install it and glue the lid in place.
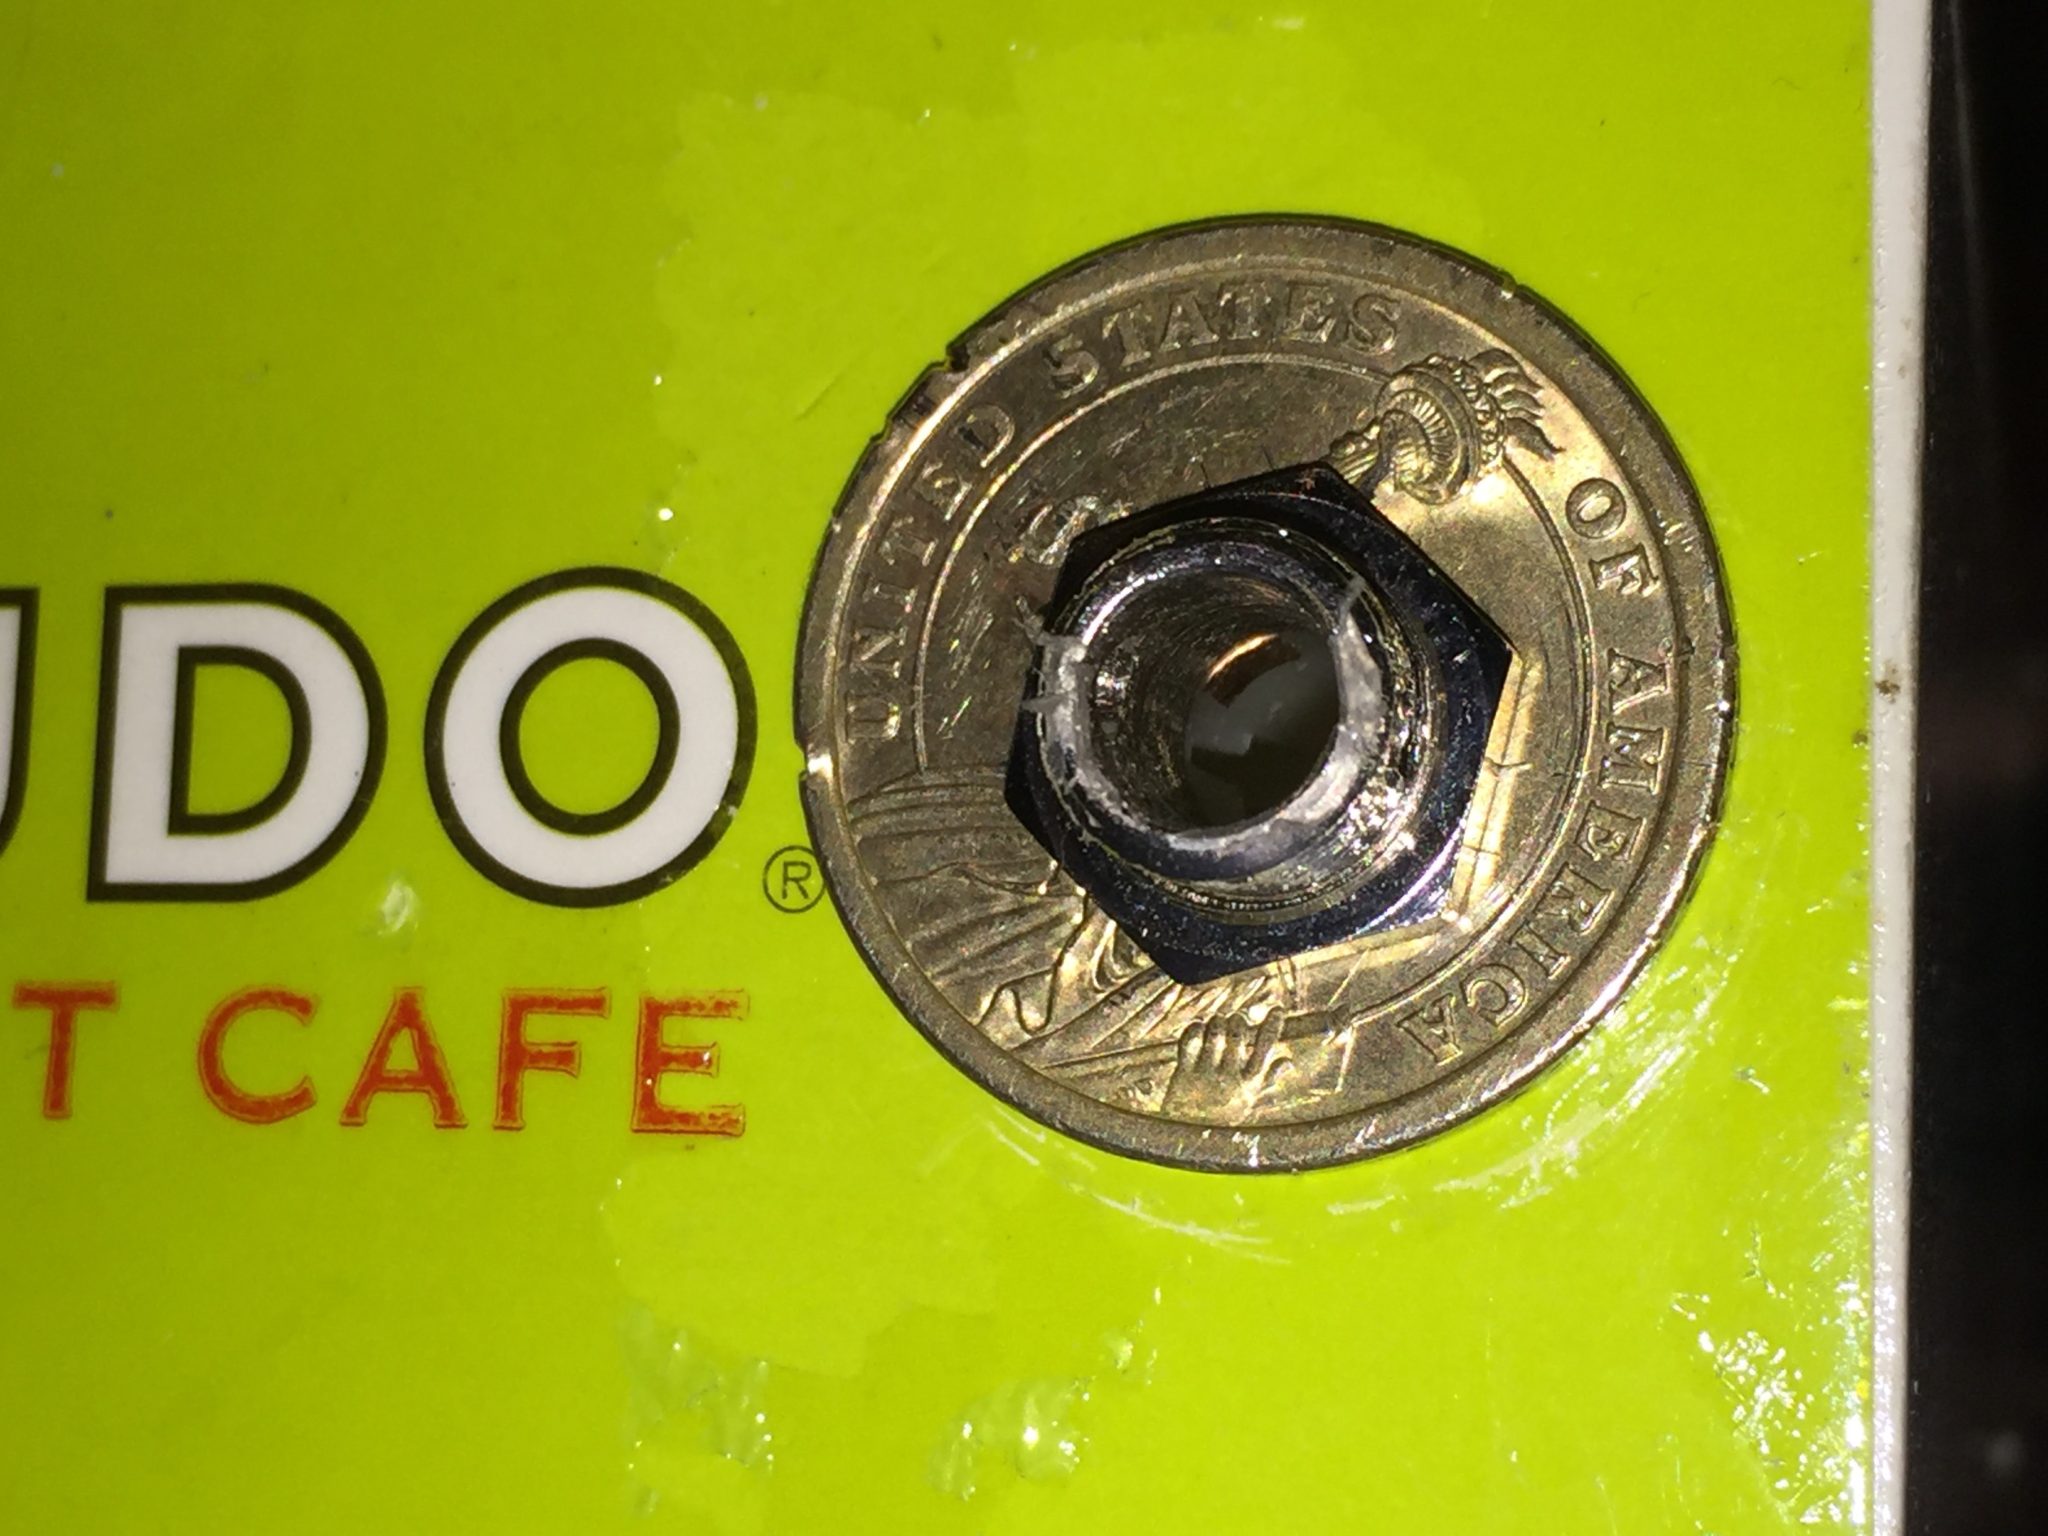
- I used a gold US 1 Dollar coin as a washer for the pickup’s trap jack.
- Attach the neck to the box. Ensure it is fit and attached perfectly. This time is for keeps.
- Glue the lid in place and let dry overnight.
- Glue the fretboard to the neck and locate it according to the measurements and markings you made to establish the centerline and the scale length. Use enough clamps to get a tight bond all the way up and down the neck. Be sure to clean up any excess glue with a damp cloth. Let it dry overnight.
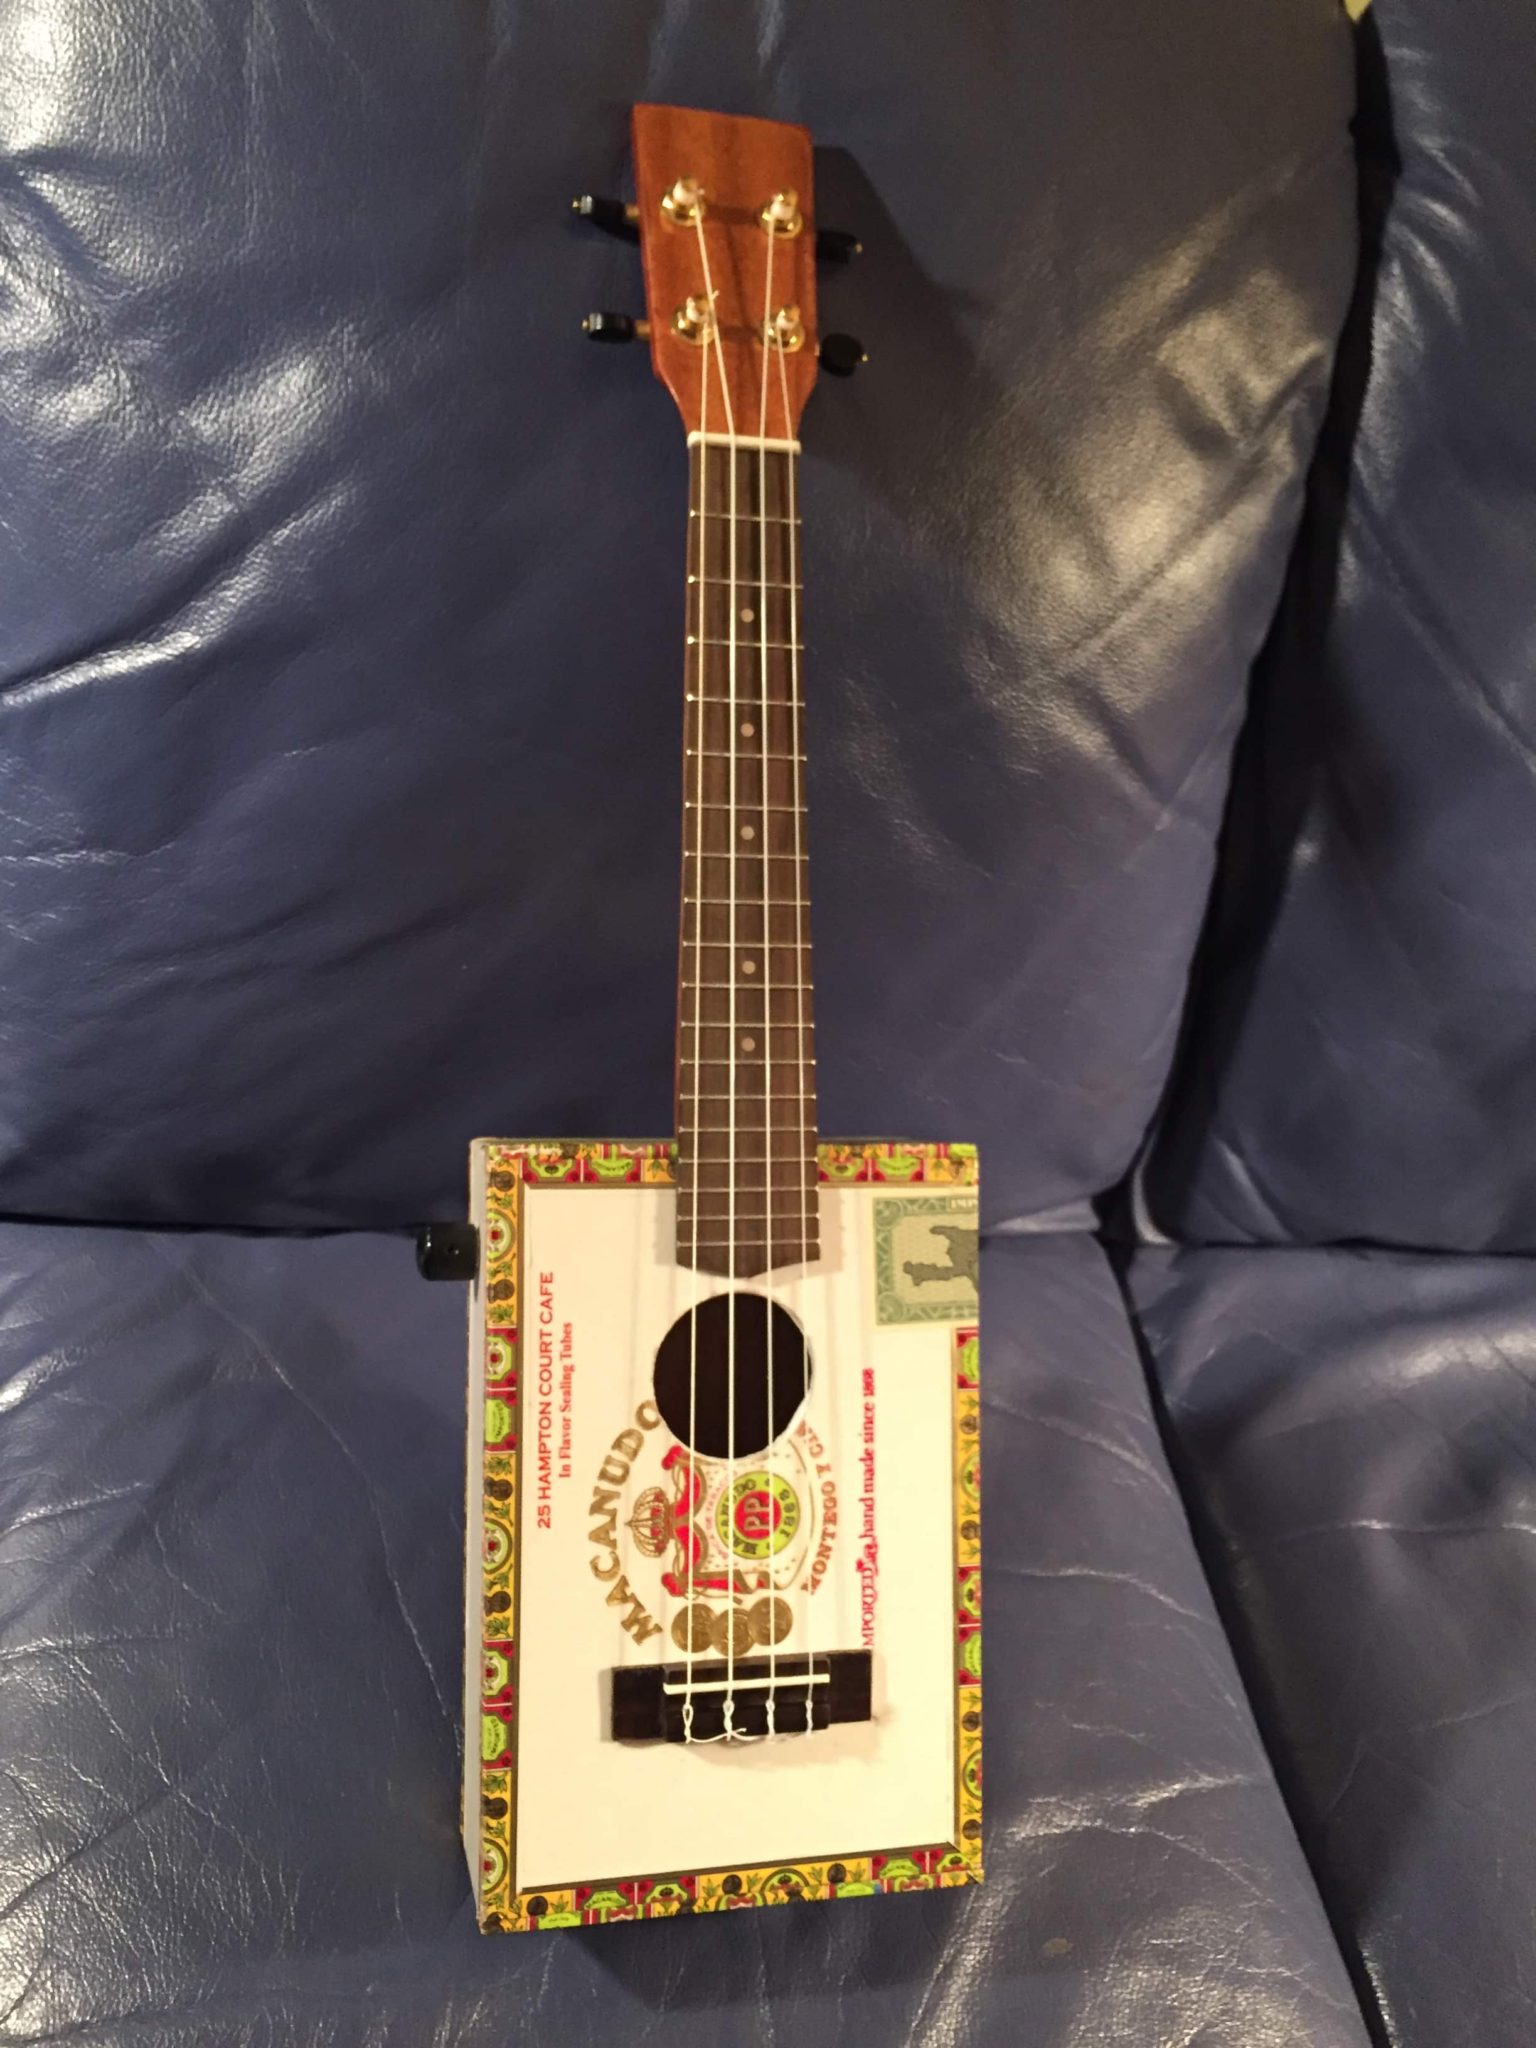
- Install the tuners.
- Install the strings and tune to pitch.
- Check the string action and playability and make any needed adjustments to the nut and/or saddle. I had to shave down the nut by about 1/32″ and it improved the tuning and playability.
- If you want to use a strap, install a strap button.
- Go strum your uke!


I clicked on Drive a Double Bass and a porn site came up. Not cool.
OMG! I’m sorry that happened. I deleted that link. Thanks for letting me know. It used to go to Michael Klinghoffer https://www.michaelklinghoffer.com/. He sells a book by that name.